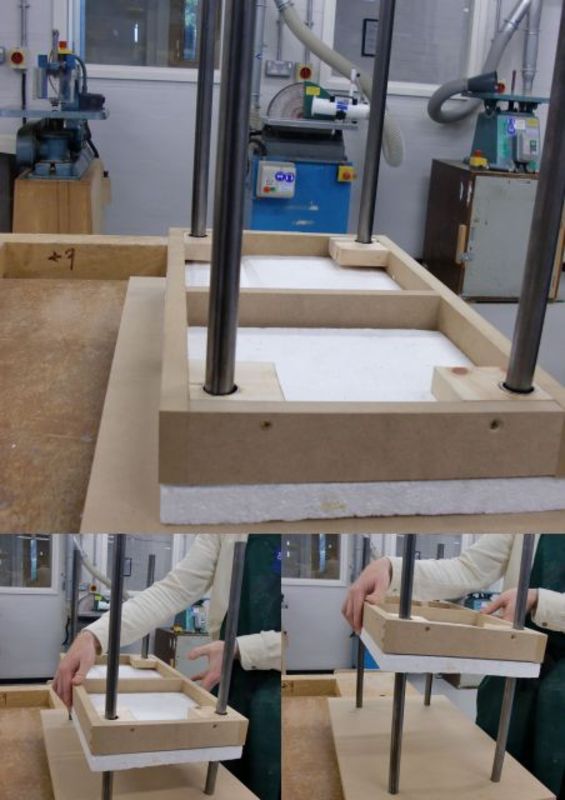
The final quasi-sectional model ready to be tested in the water.
Posted 9 May 2014 22:28
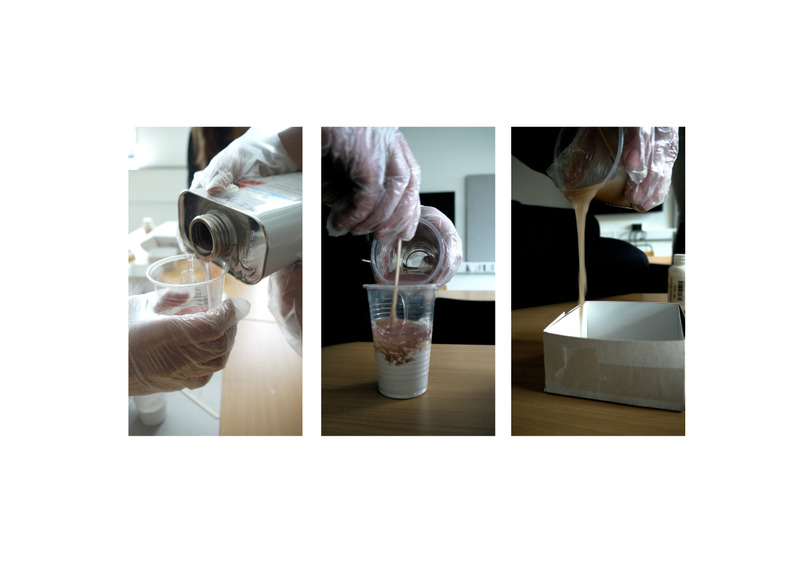
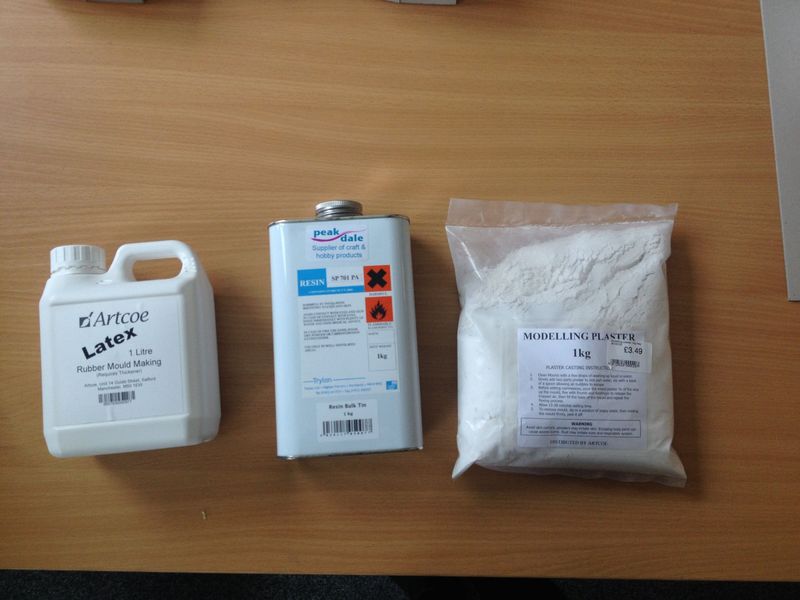
resin and plaster casts
Posted 9 May 2014 22:02
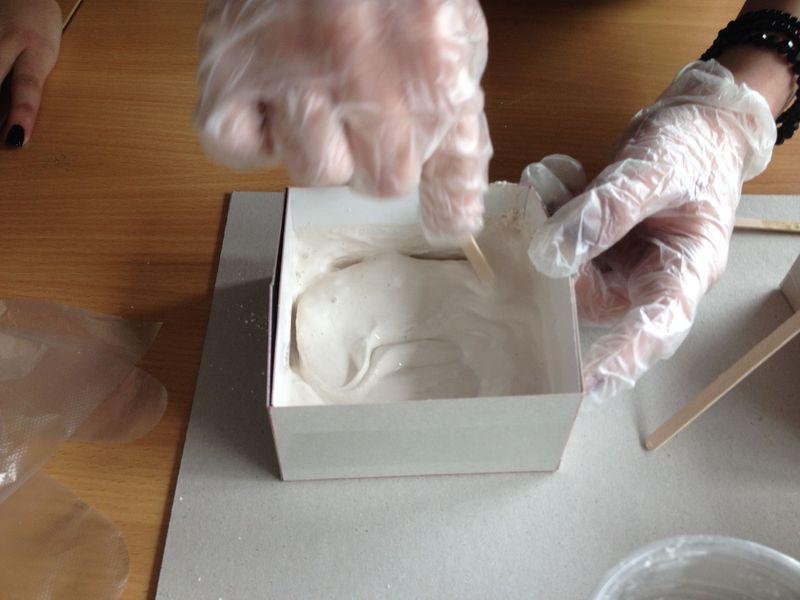
plaster cast - probably go with this. Its the fastest drying!
Posted 9 May 2014 22:01
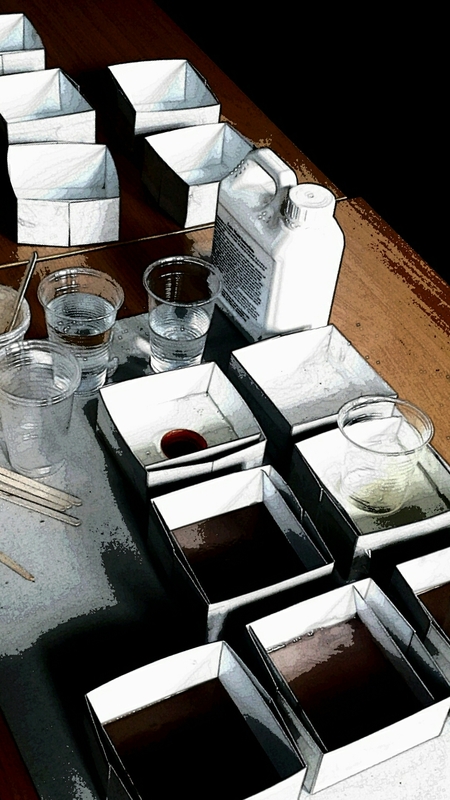
materials testing!
Posted 9 May 2014 22:00
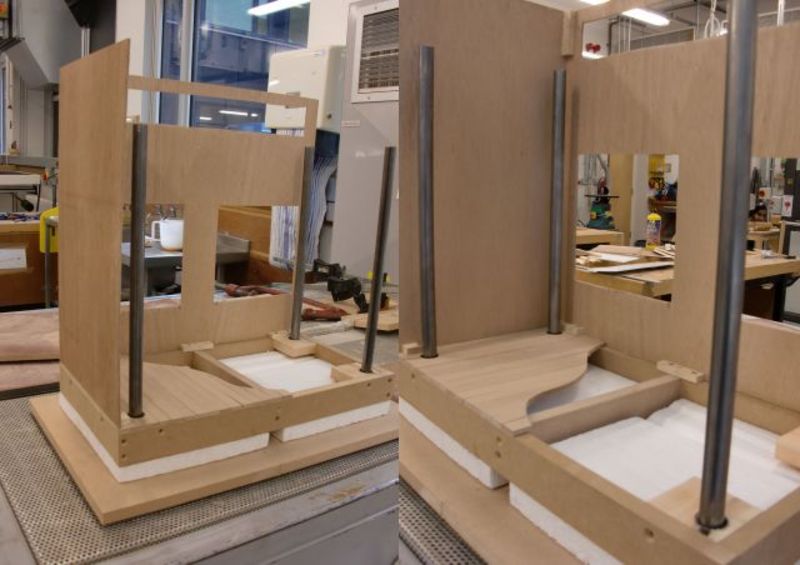
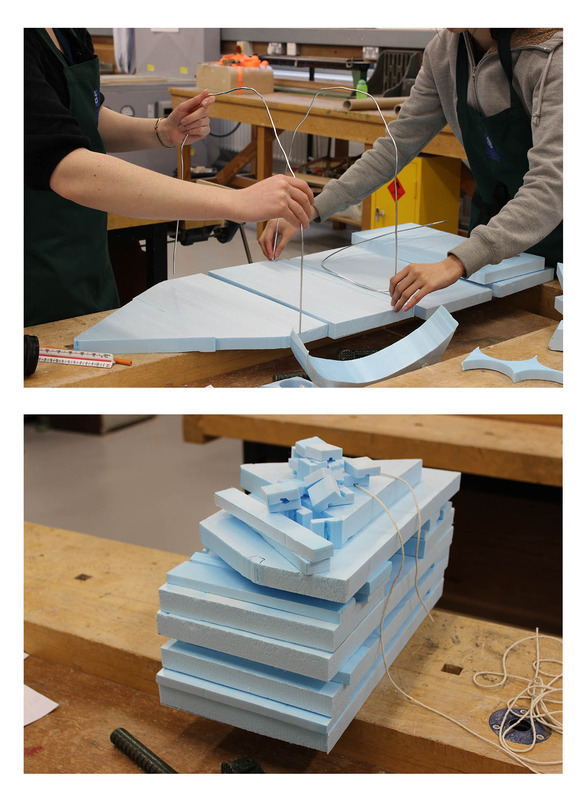
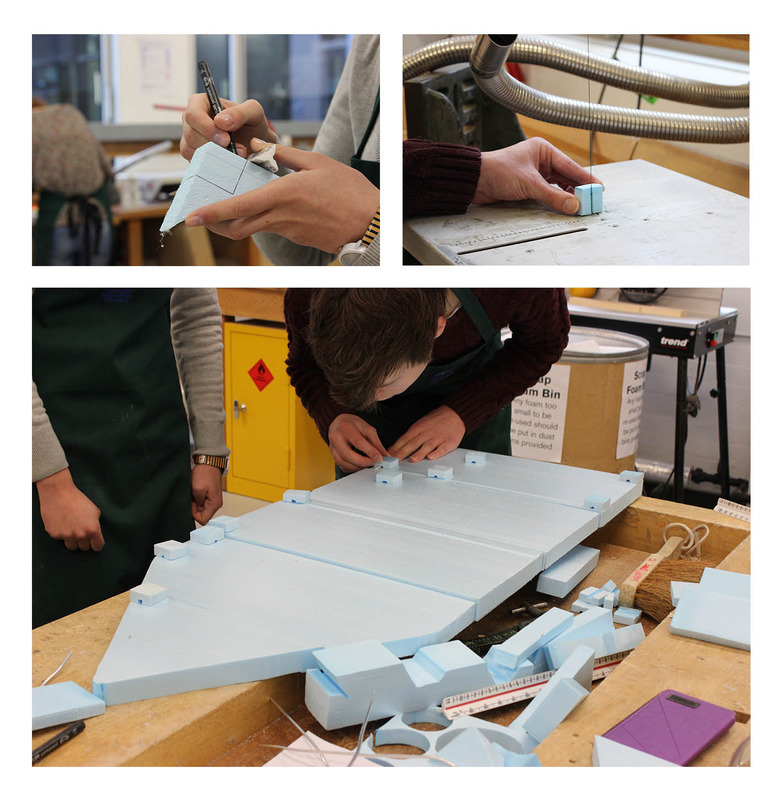
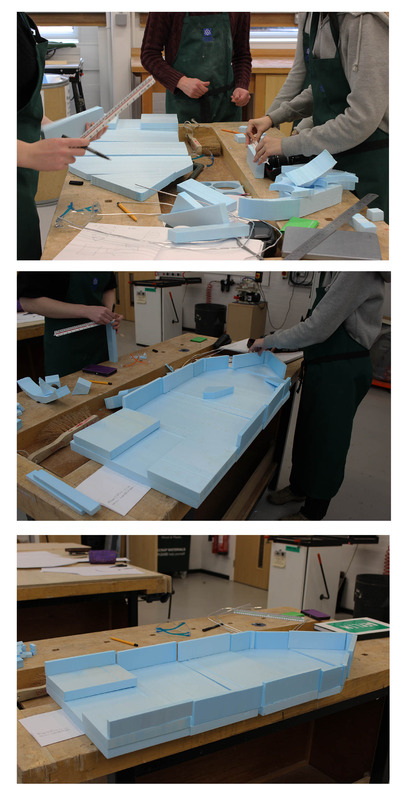
The base finished in the workshop. Foam represents mushroom material, the frame is made of wood and piles are made of metal. The image shows how it is supposed to work if the flood occurs.
Posted 9 May 2014 21:57
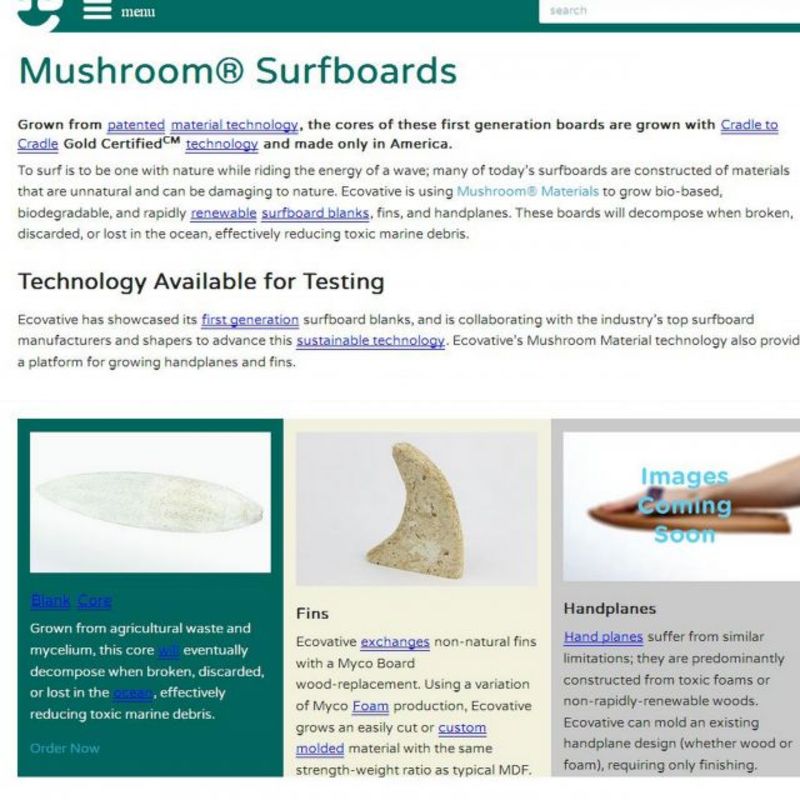
After doing some research we decided that our floating house would have a base made of mushroom board. It is eco-friendly lightweight material that has the features of more or less polystyrene. With this material you can grow your house from mycelium and agricultural waste in a few days only!
For more information, check it out at
http://ecovativedesign.com/mushroom-materials/ .
Posted 9 May 2014 21:54
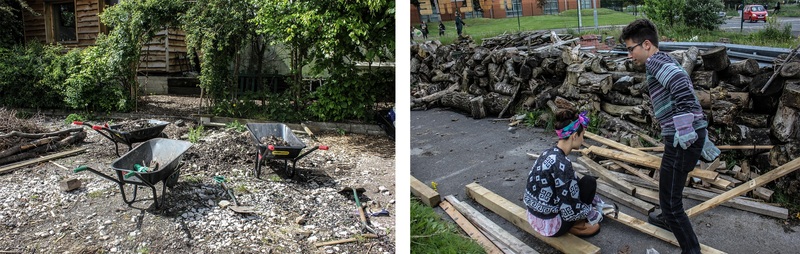
1,2,3 go! working on site today!
Posted 9 May 2014 21:48
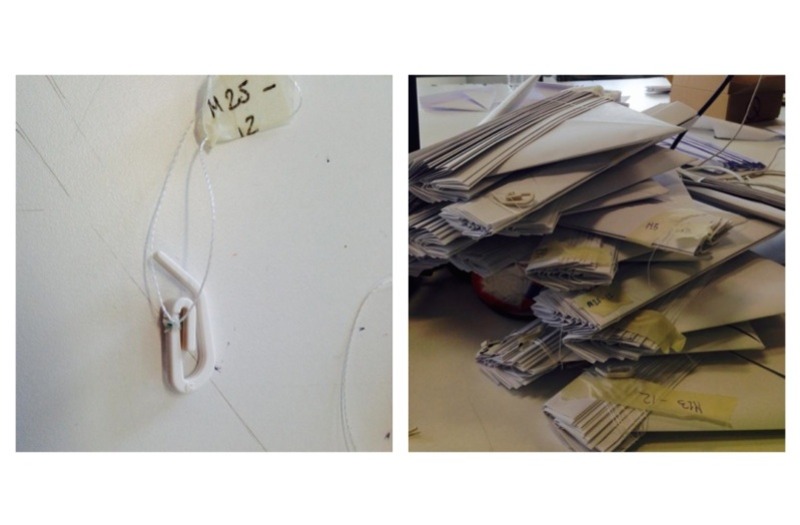
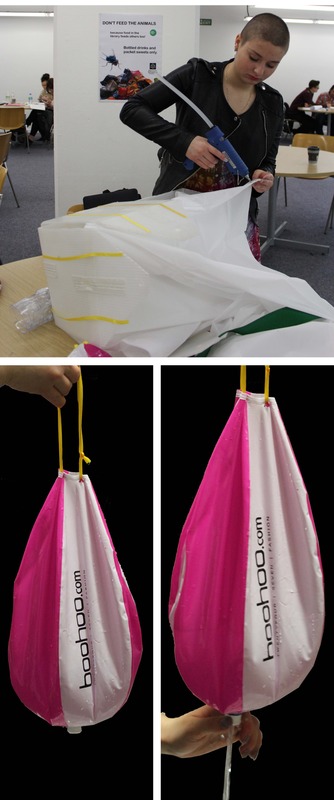
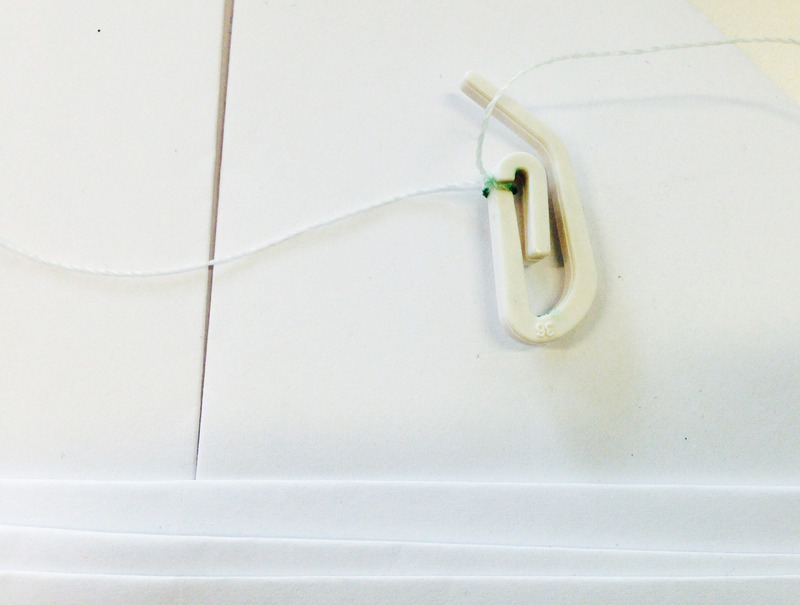
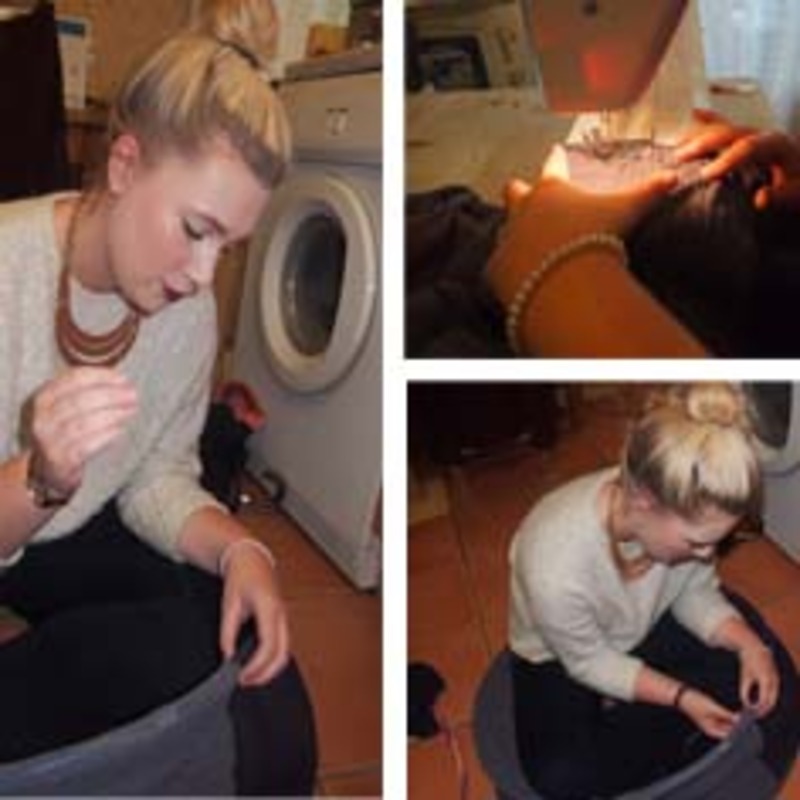
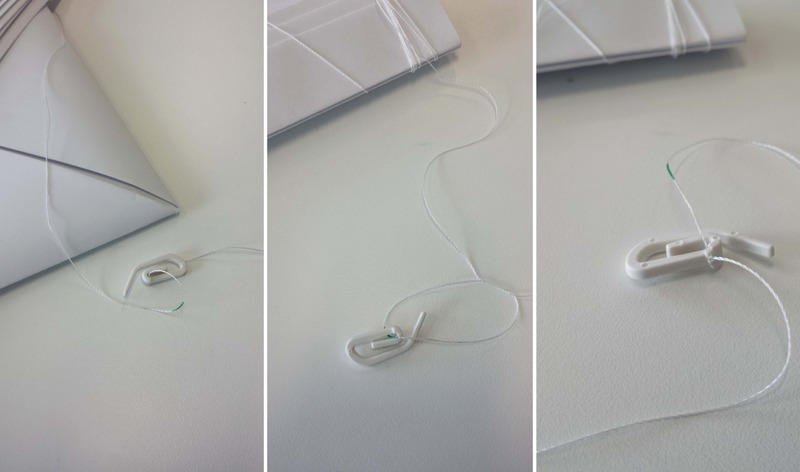
Attaching hooks to hang the hats.
Posted 9 May 2014 21:25
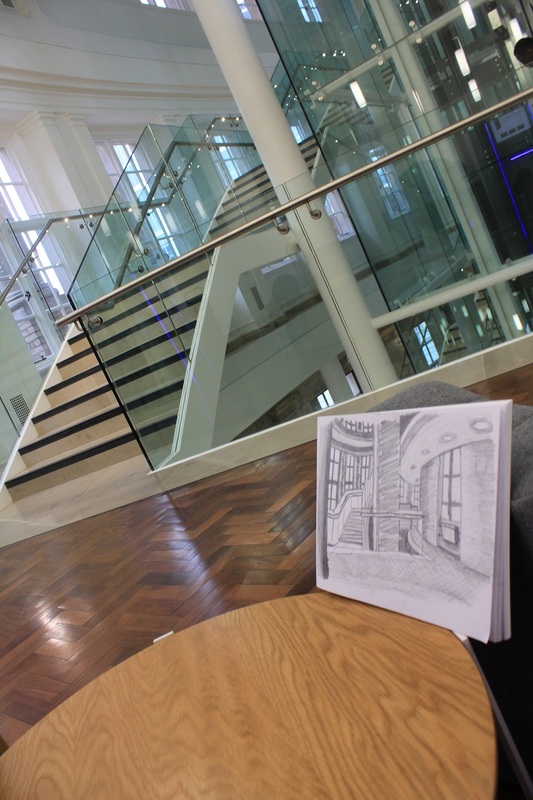
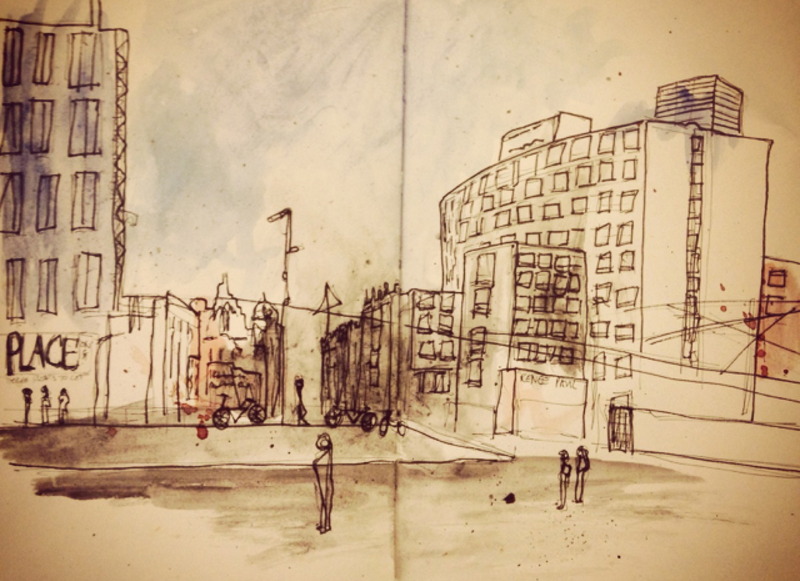
On the first day with the urban sketching group we sketched spaces inside the Manchester Central Library and the sketch i was happiest with at the end of the day was this sketch of a hallway and staircase on the 3rd floor with a nice aesthetic.
Posted 9 May 2014 21:15
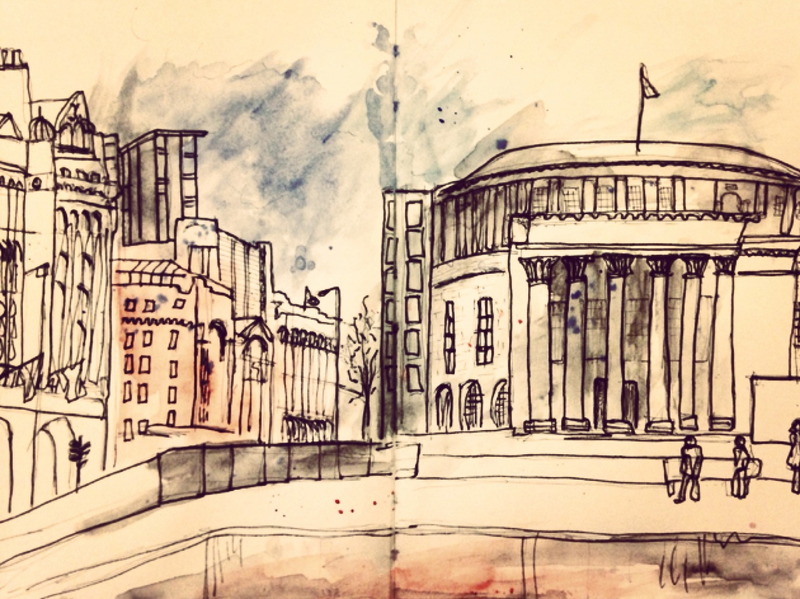
sketching outside Central Library.
Posted 9 May 2014 21:15
urban sketching with Manchester Urban Sketchers
Posted 9 May 2014 21:13
On Wednesday we also had a chance to present our ideas to Andrew Cameron. He found our Flouse interesting and therefore we finilized our design - we agreed with Andrew that it is mostly about technologies and how the base works as it would work with any design on it.
Posted 9 May 2014 21:02
Making the 1:1 model and test the beach ball working as a water container
Posted 9 May 2014 20:55
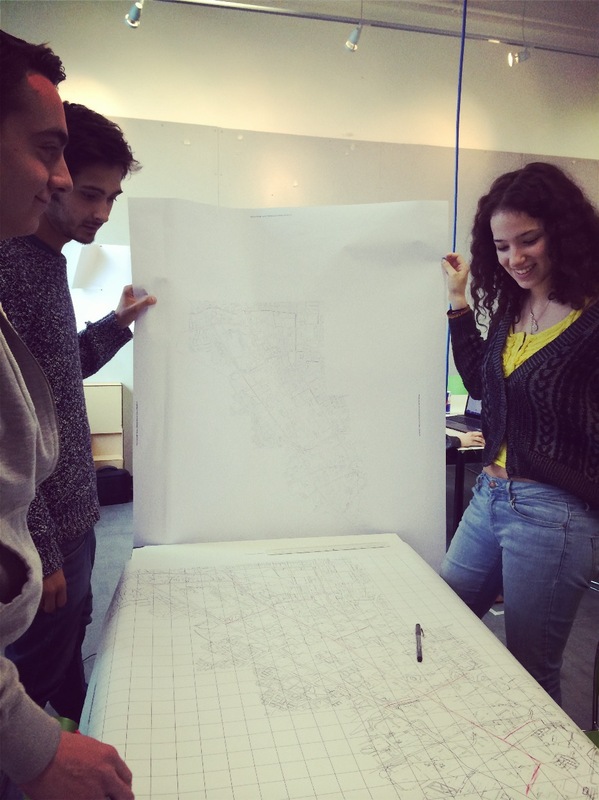
Mapping practice after data collection.
Posted 9 May 2014 20:53
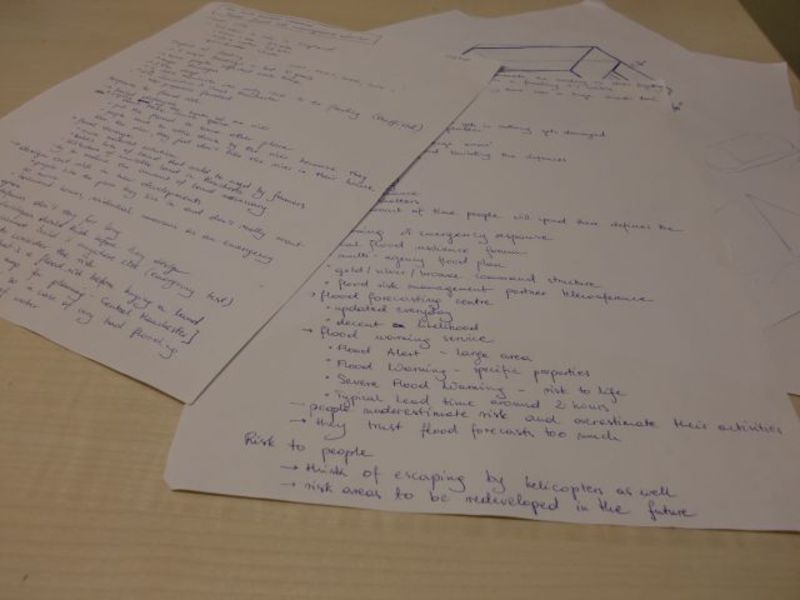
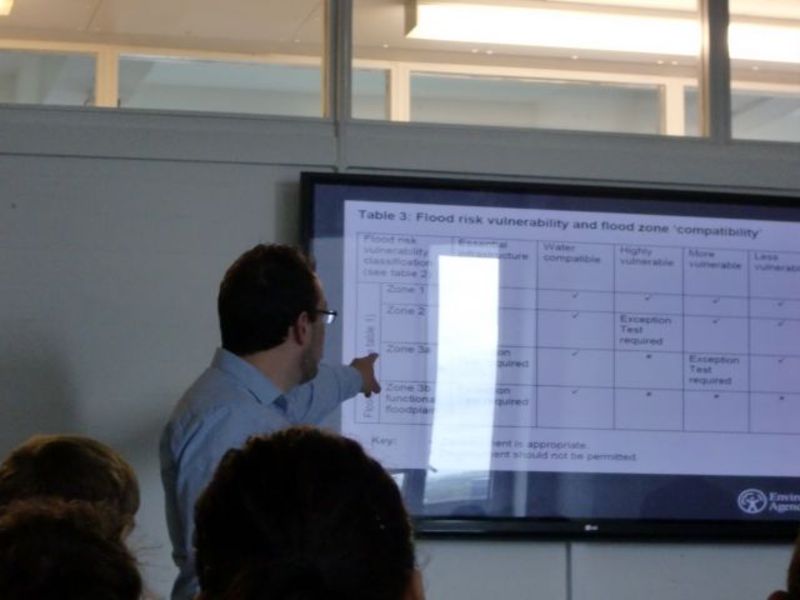
On Wednesday 07 May we received a talk from Senior Flood Risk Management Adviser Andrew Cameron who introduced us to the impact of flooding and our actual response to flood risk. He also pointed out the importance of desiging floating shelters in order to protect people from damages in advance.
Posted 9 May 2014 20:50
Test model
Posted 9 May 2014 20:35
Knotting Hooks. 400+.
Posted 9 May 2014 20:33
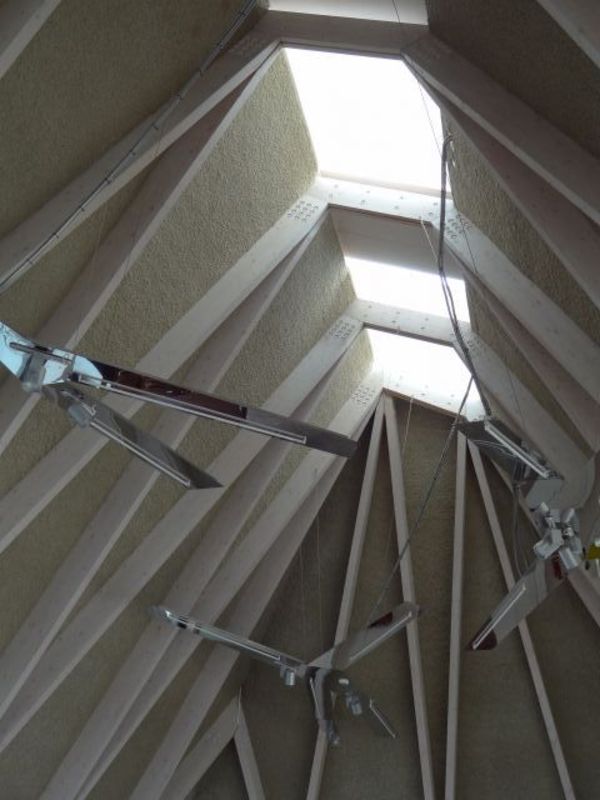
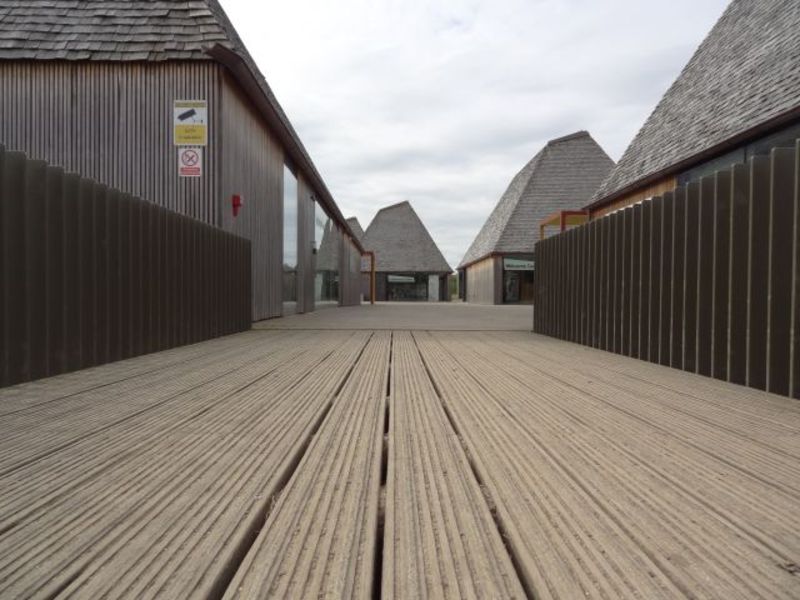
While in Brockholes we paid special attention to the construction of the houses and materials used. The roof made the biggest impression on me - especially when I touched the material it was made of and surprisingly it was soft like a carpet!
Well done, Adam Kahn!
Posted 9 May 2014 20:33
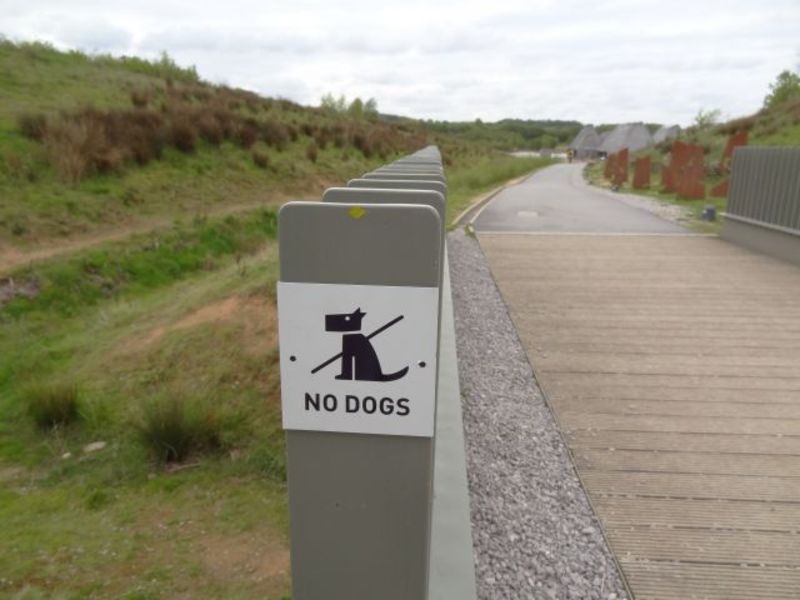
It seems there are still places to which dogs are not allowed! :)
Posted 9 May 2014 20:22
After having decided that Brockholes Nature Reserve are going to be our main precedent we went for a trip there to see how it works in reality. The image shows what it feels to walk onto the floating platform.
Posted 9 May 2014 20:20
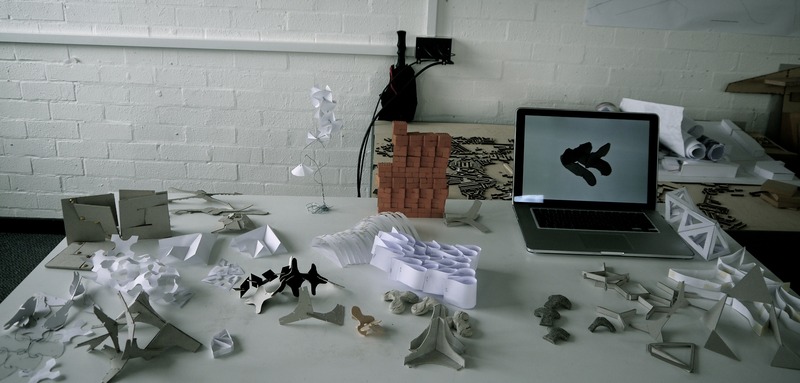
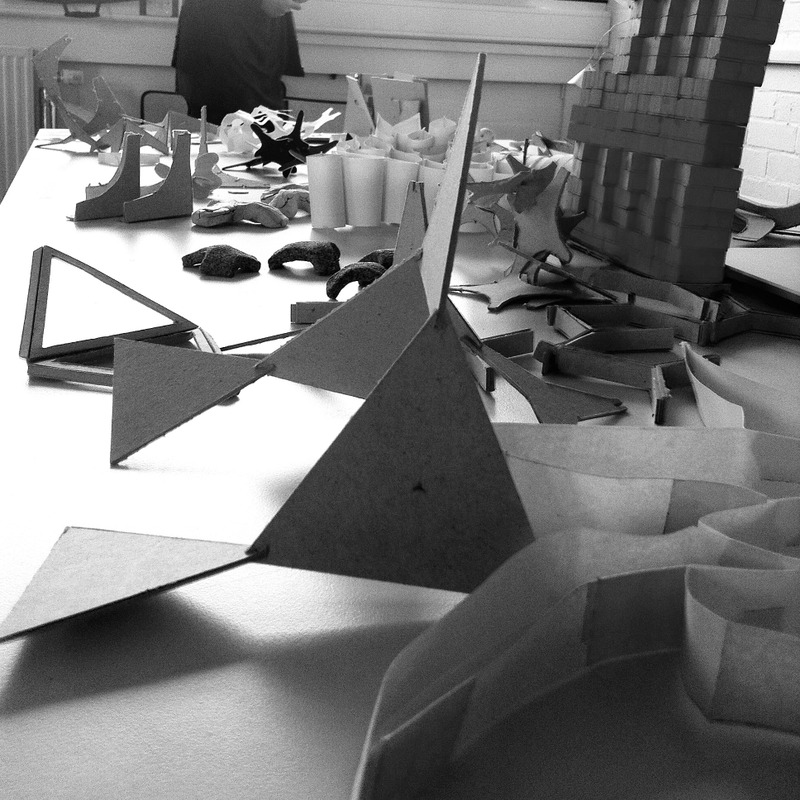
Working in groups, we further developed the shortlisted models.
Posted 9 May 2014 19:36
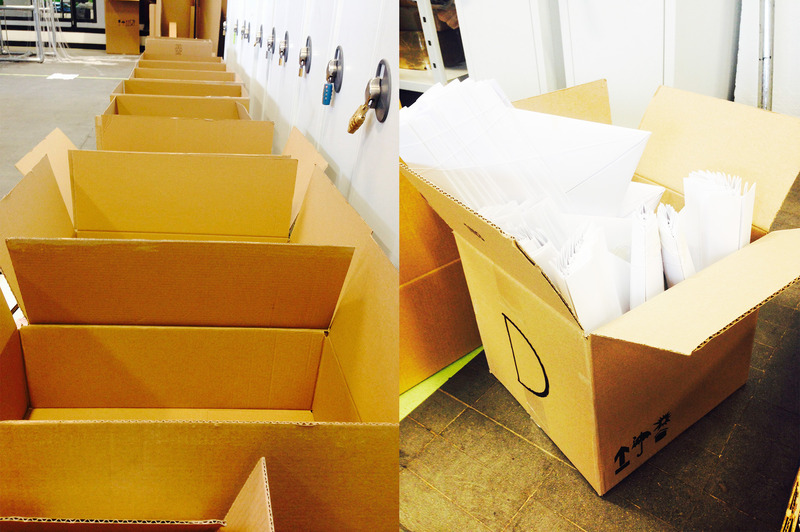
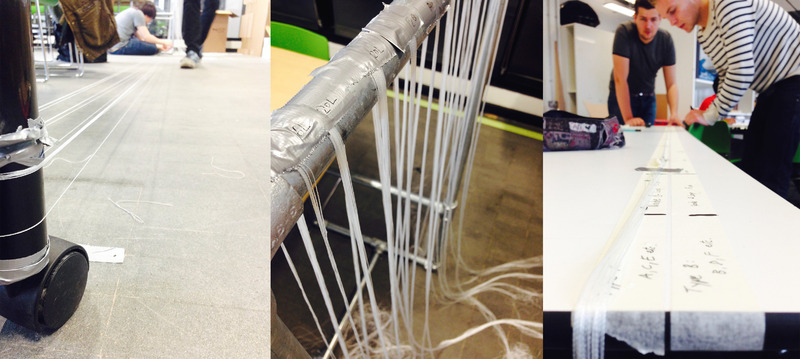
The boxes used to store the completed bundles of threaded hats are filling up! By the end of day 4 the hats and threads required to make the screen are completed and ready to install.
Posted 9 May 2014 19:29
Day 5
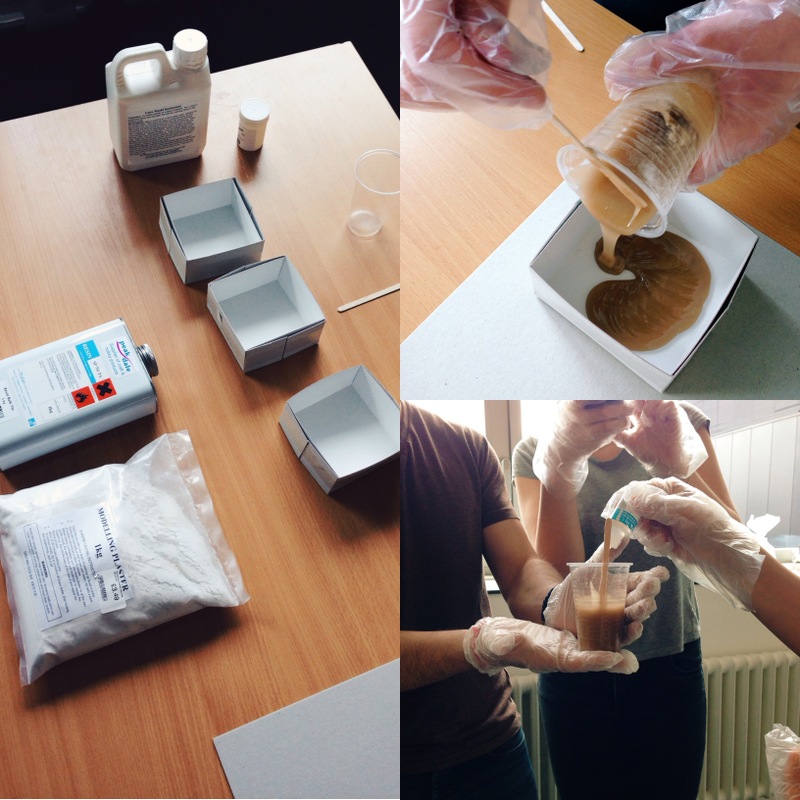
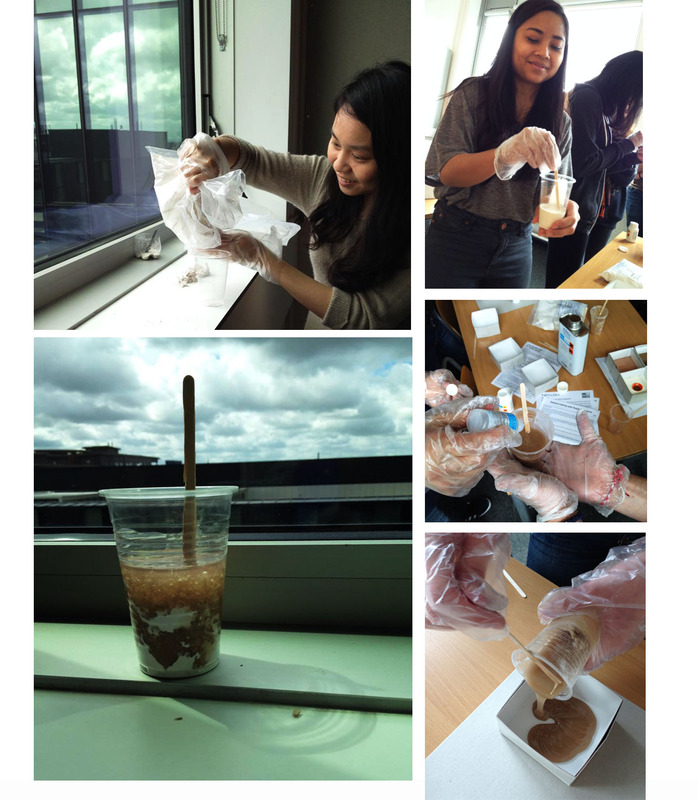
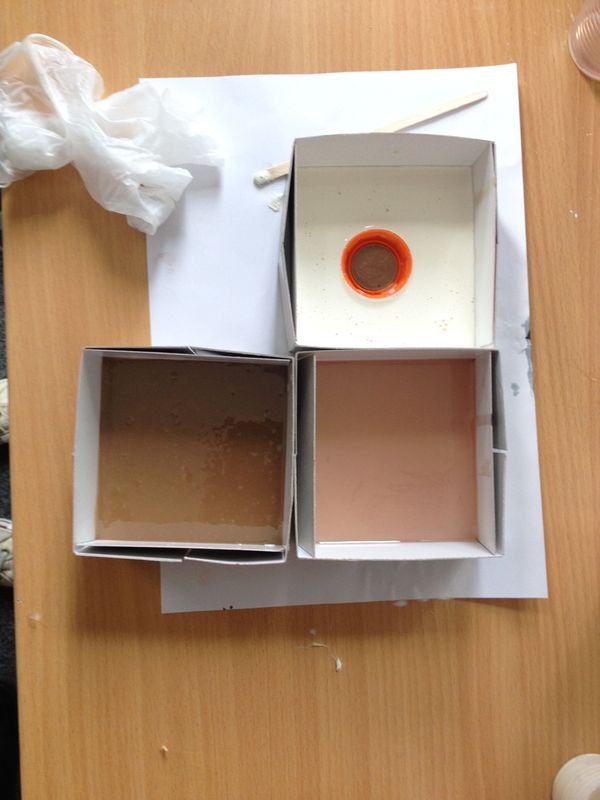
Today we experimented with a variety of materials for the moulds and the components. We tested out plaster, resin and latex to see which one would be the most appropriate for our purpose.
Posted 9 May 2014 19:26
To hang the installation, a fishing net will be stretched across the ceiling of the church, and each thread of paper hats carefully hooked on. We decided on using curtain hooks to hang the threads from. Knotting them was a fiddly process to say the least!
Posted 9 May 2014 19:21
A 3d printed model of our proposal!
Posted 9 May 2014 19:17
The patching process involves threading the hats together and using duct tape to separate them, before bundling them together ready to put on the hooks.
Posted 9 May 2014 19:14
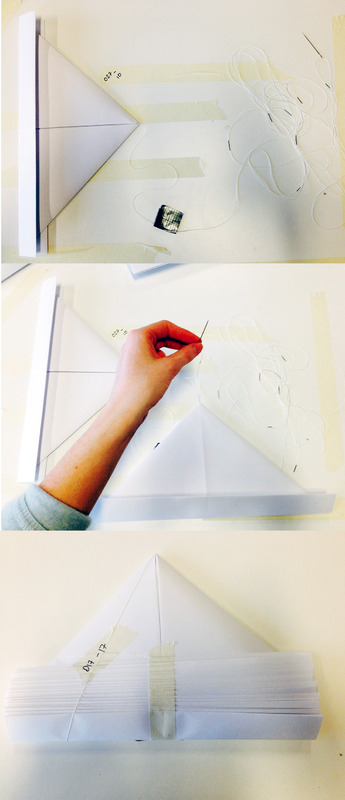
In order to hang the hats, 380 threads needed to be measured, cut, separated and marked ready for the 'patching' process.
Posted 9 May 2014 19:12
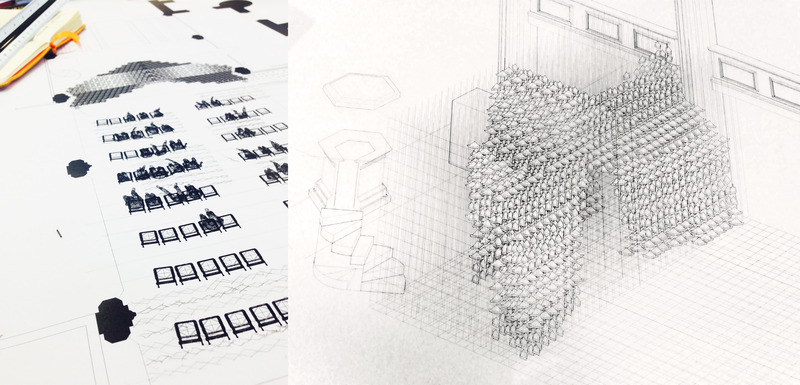
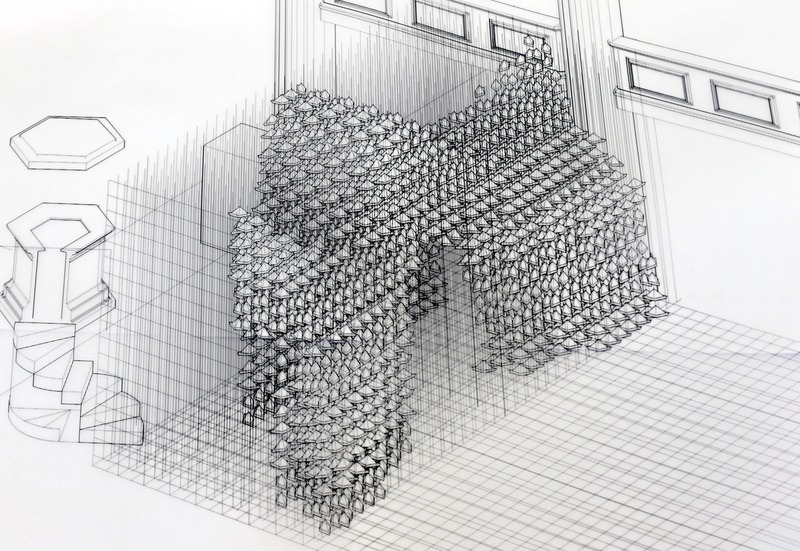
Modelling the installation using computer software enabled us to accurately work out how many hats, threads and hooks we will require to make the installation and how it will fit into the church.
Posted 9 May 2014 19:10
Hats, hats and more hats. By day 2 we have made over 3,800 and can now all probably fold them with our eyes shut!
Posted 9 May 2014 19:08
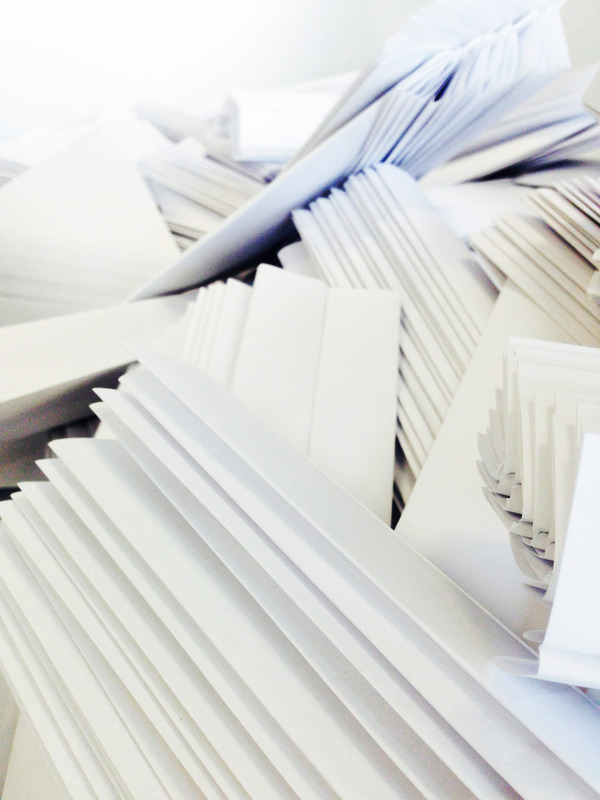
The aim of our project is to create and install a backdrop and screen for the hat show taking place in St Mary's church in Stockport. These are the first of many paper hats to be made and strung up to form the installation!
Posted 9 May 2014 19:07
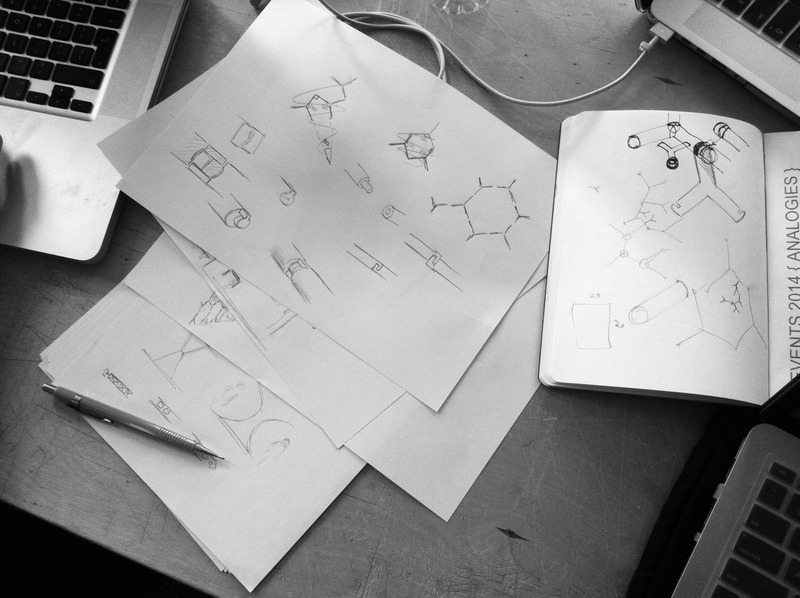
Day 1: Putting down initial ideas on paper
Posted 9 May 2014 19:04
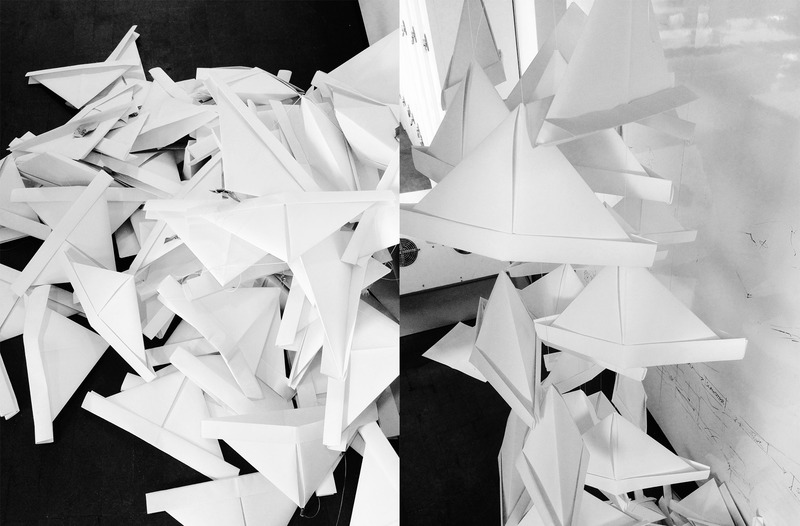
Day 4: dry testing some designs
Posted 9 May 2014 18:37
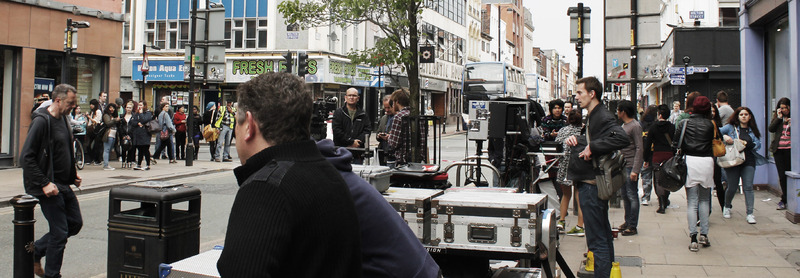
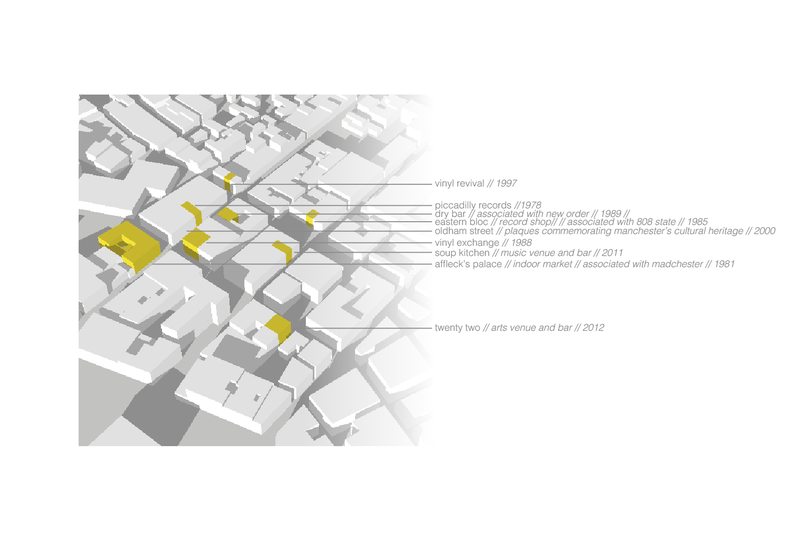
We went to NQ to view the bronze plaques commemorating famous Mancunian bands. While we were there, a pepsi ad was being filmed, highlighting the commercialisation of a place famous for being anarchic.
Posted 9 May 2014 18:19
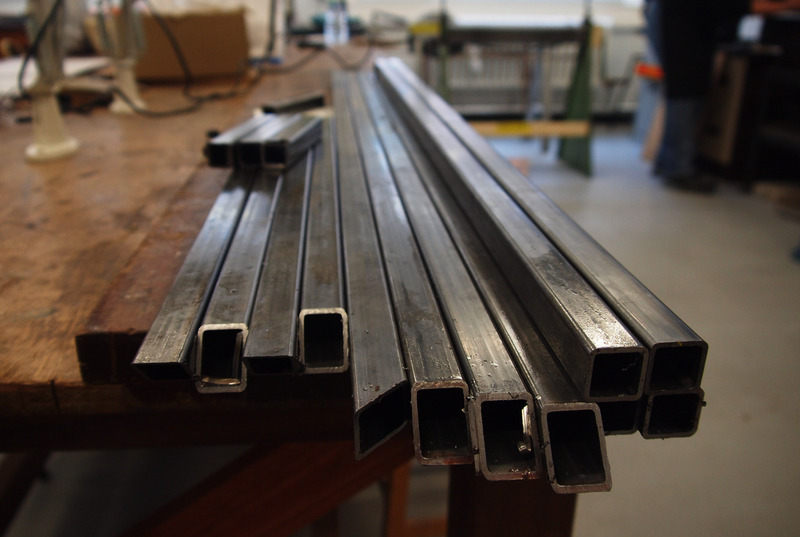
Tubes stacked in the metal workshop ready to file and weld into a frame.
Posted 9 May 2014 18:06
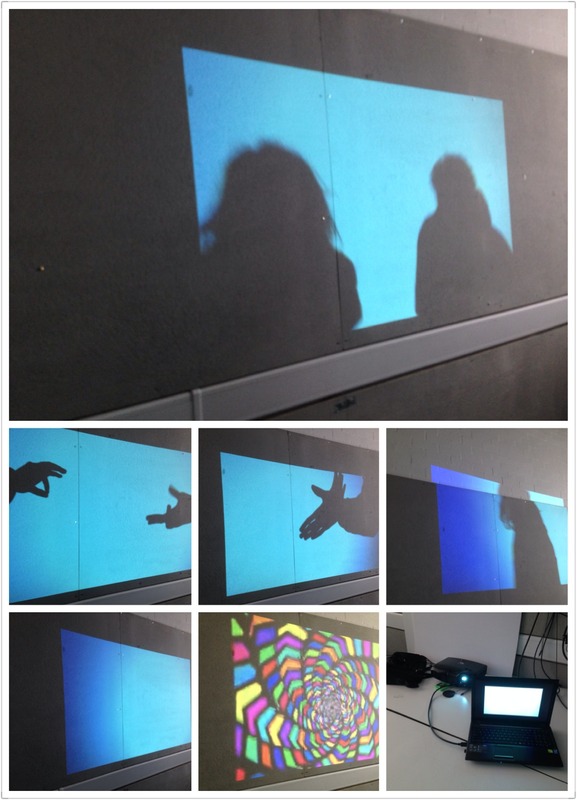
Day 4, movement test. We used projector and laptop to project the image on the wall, we tested the visual effect of our proposal.
Posted 9 May 2014 17:59
Metal tubes ready for filing and welding for the frame of the floating structure.
Posted 9 May 2014 17:59
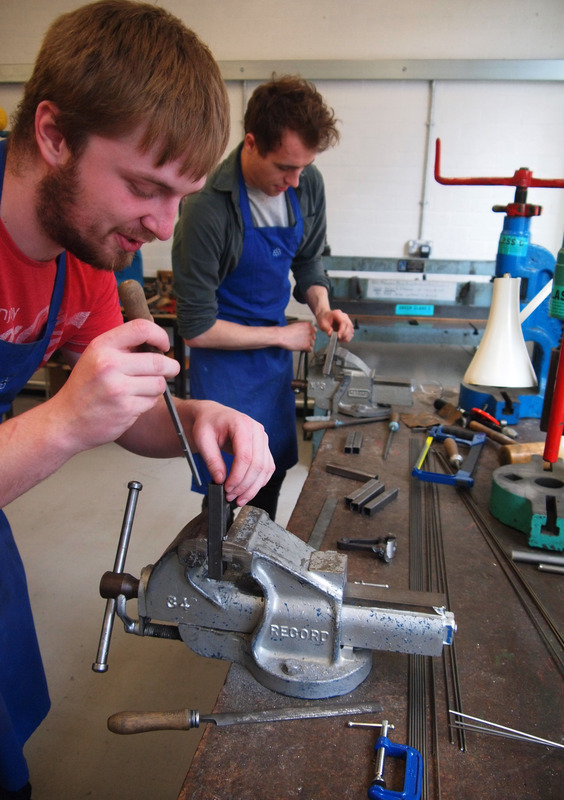
Dan and Nick working on their floating prototype model. Lots of filing of metal tubes for the frame which will then be welded together.
Posted 9 May 2014 17:57
Map showing music-related sites in NQ.
Posted 9 May 2014 17:48
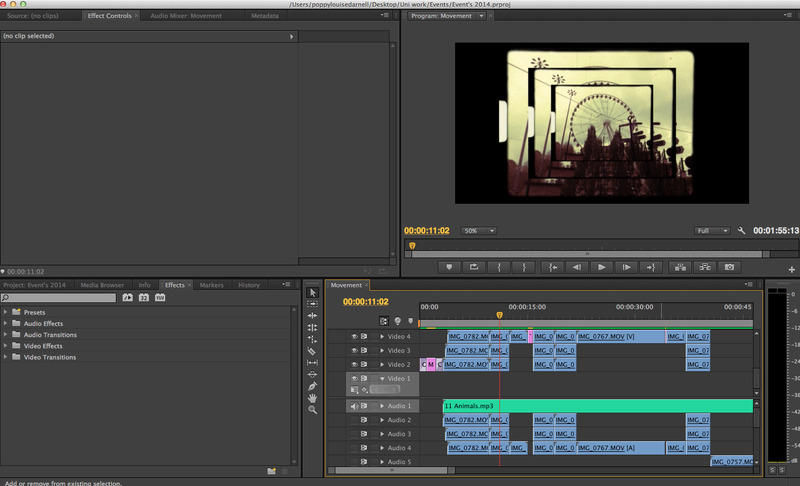
This is an image of me editing footage of Manchester Piccadilly, the short video is called Movement in Manchester Piccadilly and I used Adobe Premiere Pro to edit.
Posted 9 May 2014 17:46
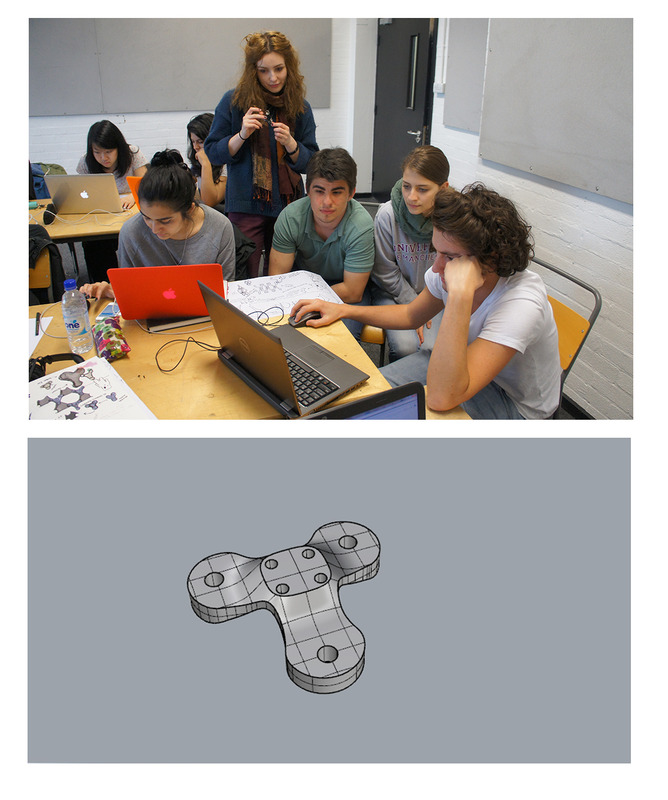
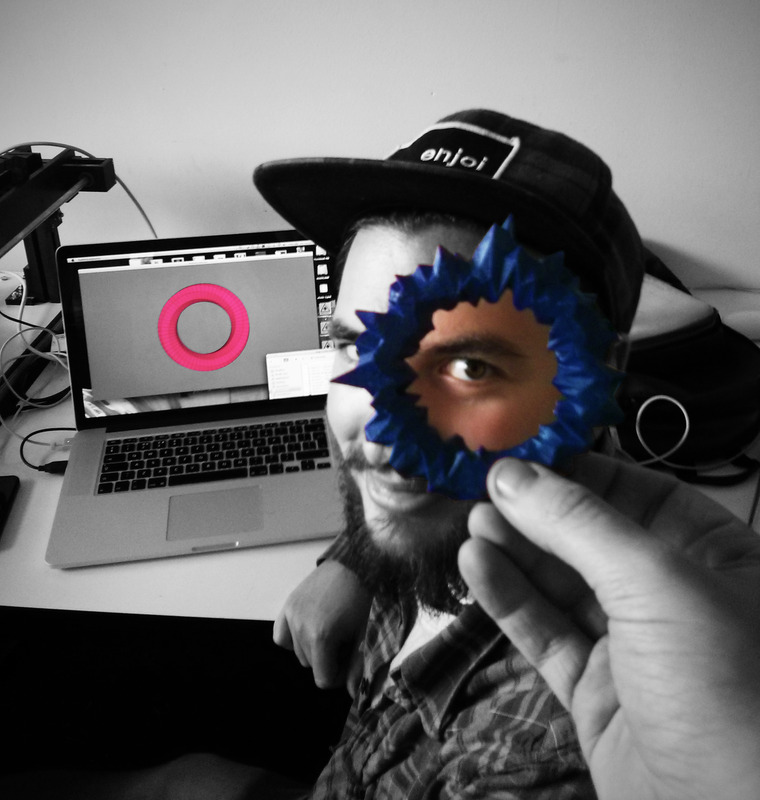
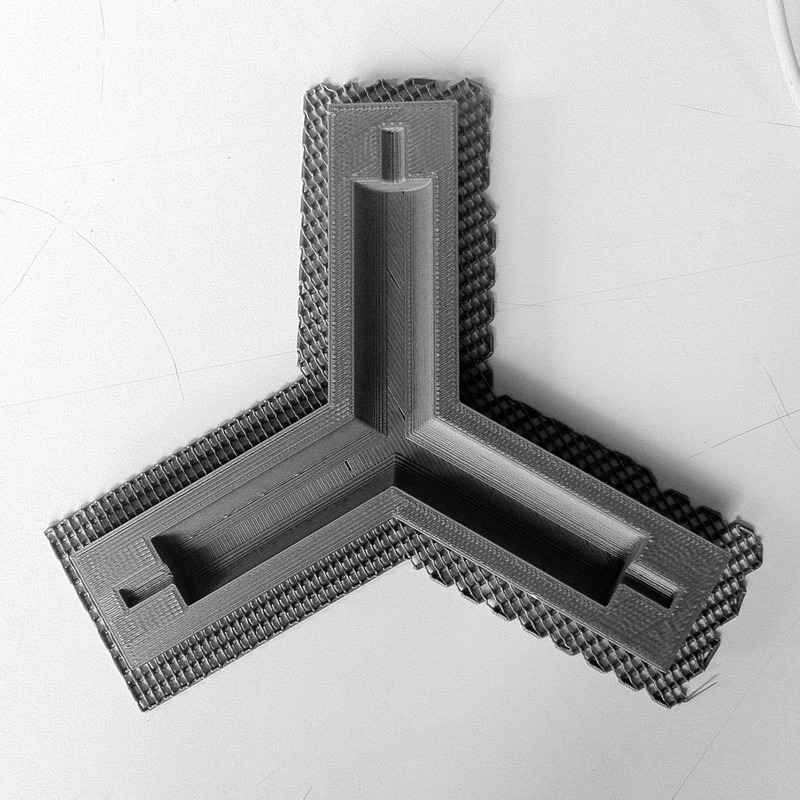
Day 4 // I added holes and connectors to the component.
Posted 9 May 2014 17:40
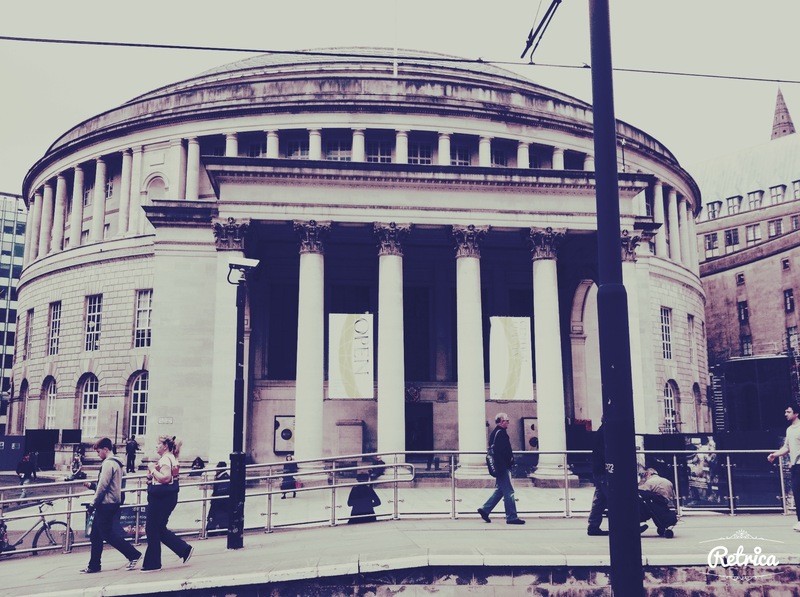
This is the site chosen for Urban Sketching, The Library. We sketched with other keen artists and learnt how to sketch in confidence.
Posted 9 May 2014 17:40
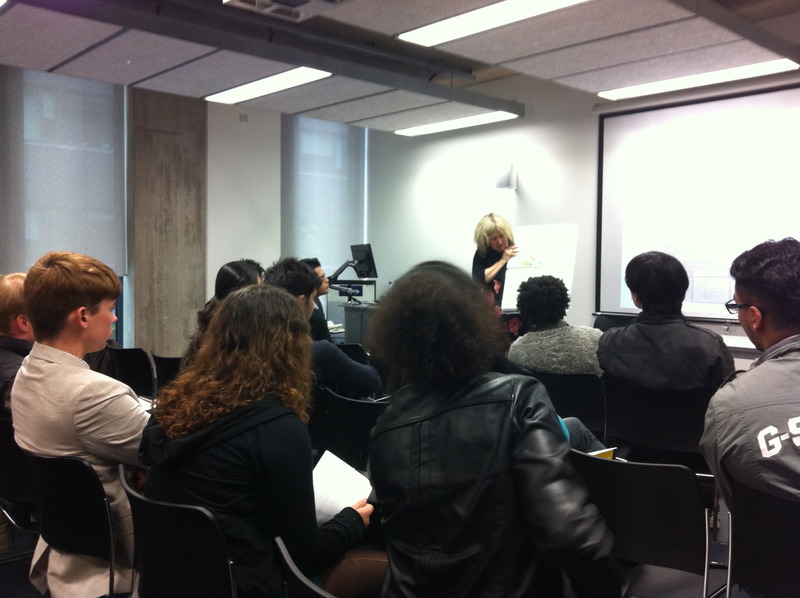
This is an image showing a talk we had about Urban Sketching, we then went to a site to begin our own Urban Sketching.
Posted 9 May 2014 17:38
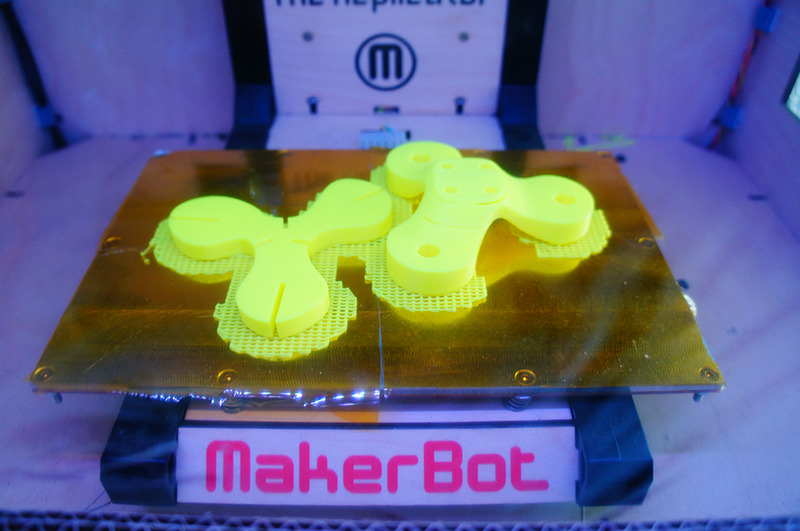
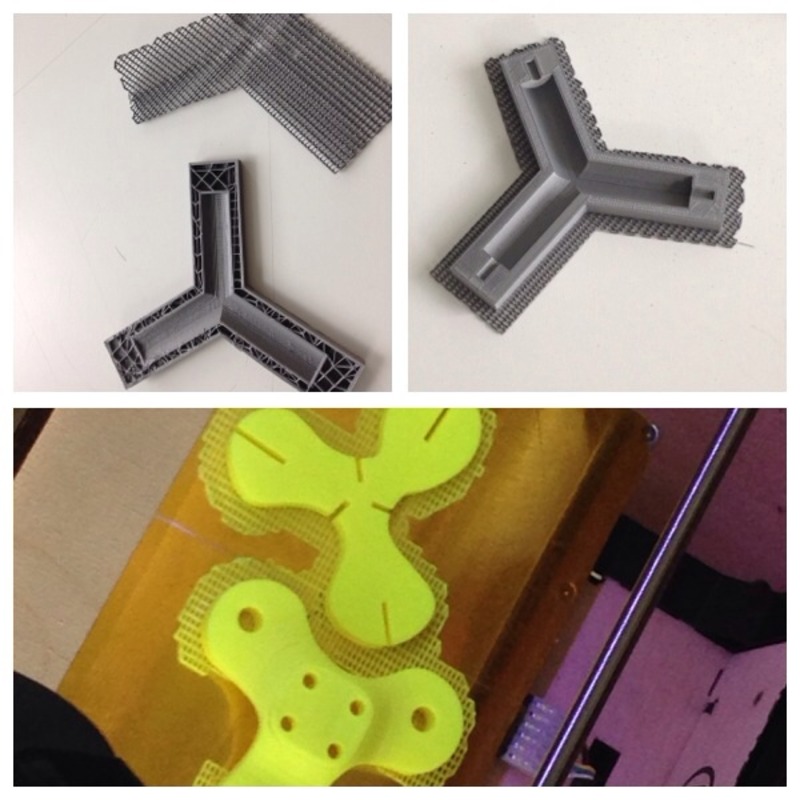
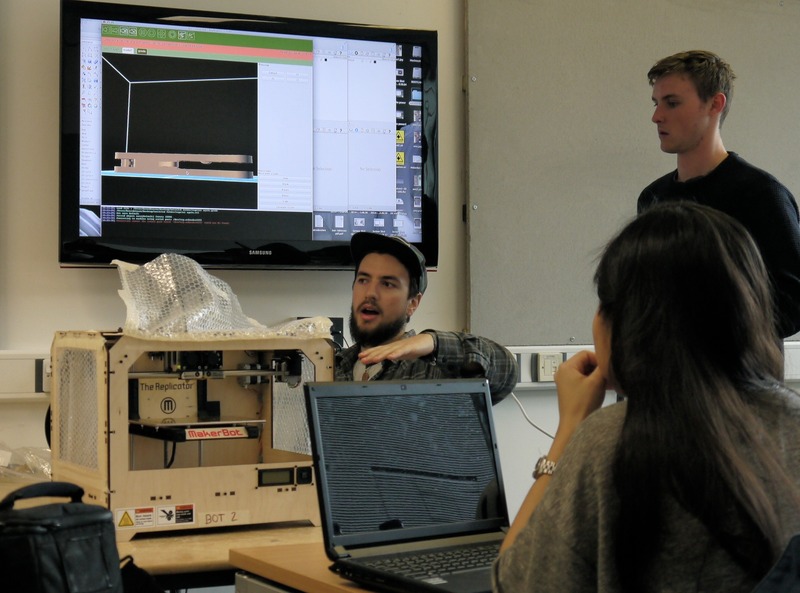
The successful 3D printing of our components today
Posted 9 May 2014 17:35
Discussing narratives and sites with Captain and crews.
Posted 9 May 2014 17:34
Day Four:
Today was about making and developing your garment. The envelope to our garment is complete but we are still having problems with the structure: it needs to be a flexible skirt as well as a sturdy shelter. More experimentation is needed.
Posted 9 May 2014 16:50
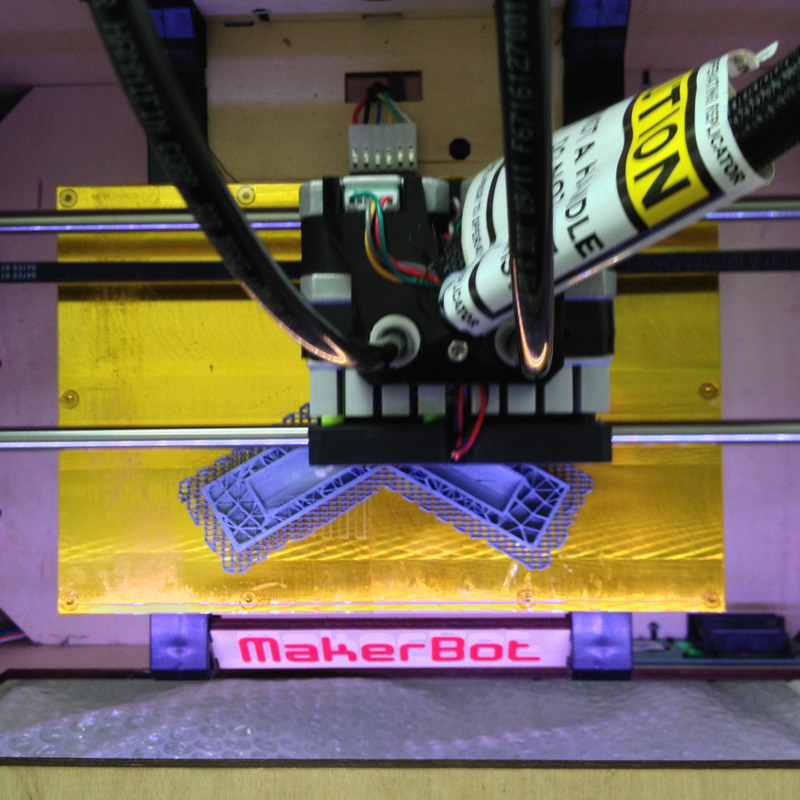
Day 5 // Morning session // Introduction to 3D printing
Posted 9 May 2014 16:45
Day 5 // Afternoon session // Materials testing // Plaster, resin and latex.
Posted 9 May 2014 16:40
Day 3 // Presentation on individual models.
Posted 9 May 2014 16:24
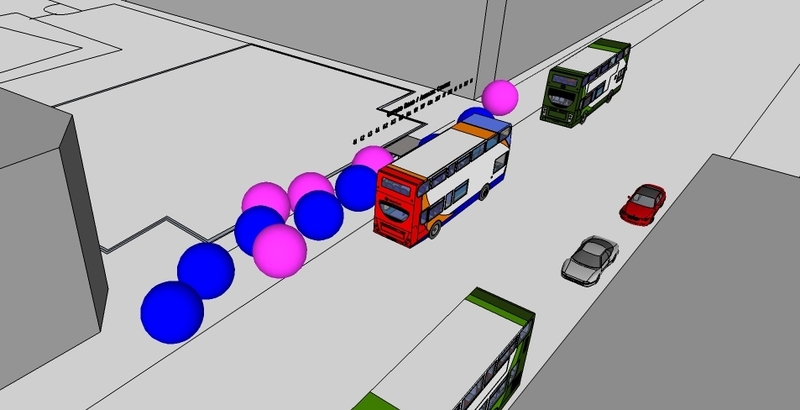
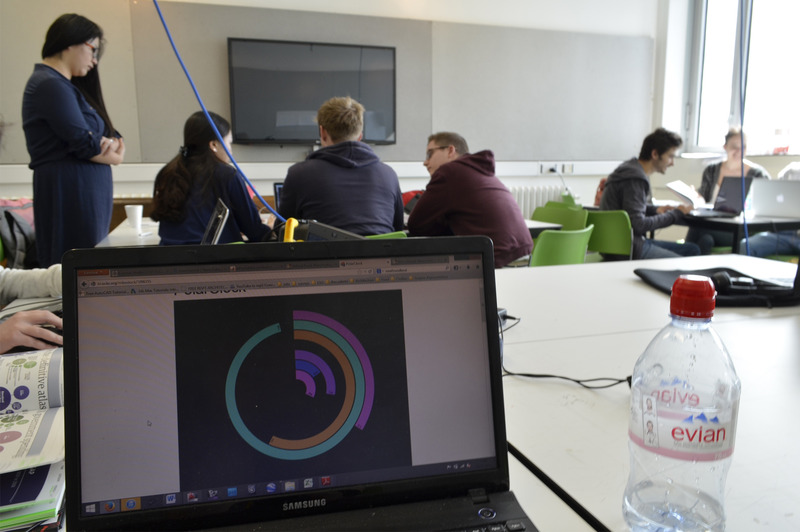
04 - Information and data collected are transformed into 3d; the image shows the average number of people getting on and off the bus at Aquactic Centre's bus stop on Oxford Road) . For the following week, we have to produce 3D visualisations of traffic flow (direction+speed), congestion (measure number), bus/car (colour-coded), buildings, bus stops, regions, etc.
Posted 9 May 2014 16:24
We went to Castle Field again on the next day and explored the sea life around Castle Field; followed the messages in bottle left for us by the Captain.
Posted 9 May 2014 16:22
DAY 3: Through trialling hanging the hats, we worked out how many strands of hats needed to create the screen. We then put the design into a grid system working out how many strands we needed in total: 380
Posted 9 May 2014 16:20
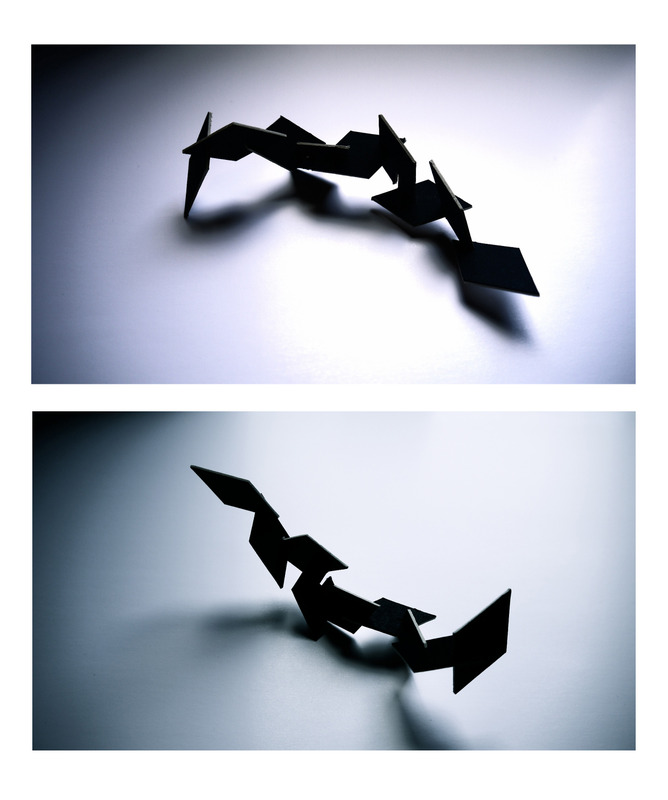
Day 1 // Making sketch models // We were asked try not to connect components together with glue, so I was thinking maybe we can cut holes in the component and connect them with a wire structure.
Posted 9 May 2014 16:13
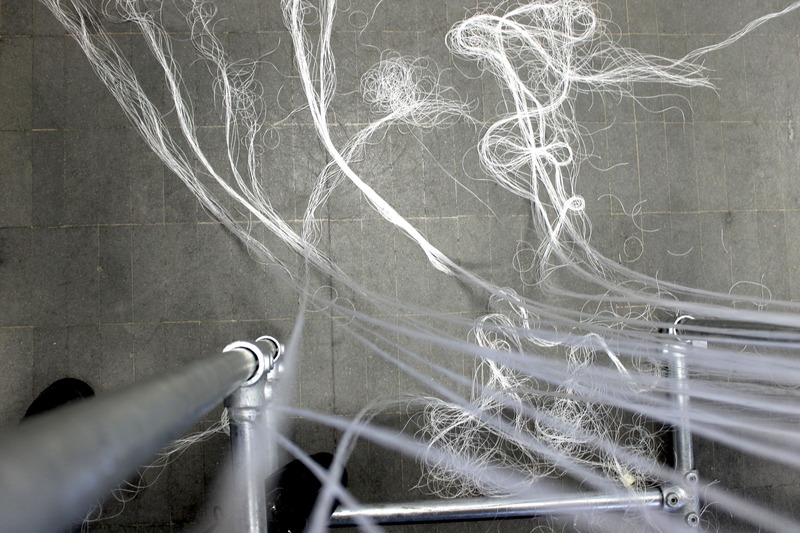
DAY 4: Thread everywhere!
Cutting the different lengths of thread and sewing the hats together.
Posted 9 May 2014 16:09
Group model proposals.
Posted 9 May 2014 16:06
Making molds for the components
Posted 9 May 2014 16:05
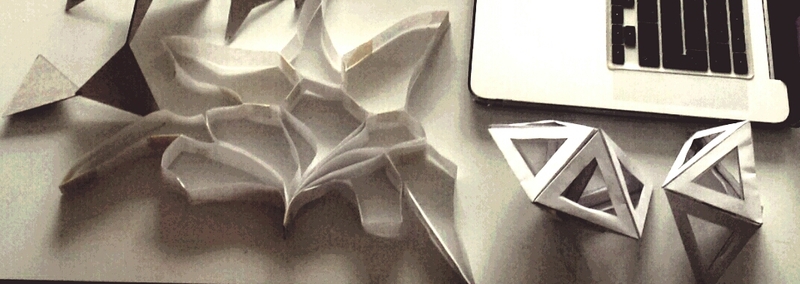
Understanding the shapes the components can make
Posted 9 May 2014 16:04
Rough model proposals.
Posted 9 May 2014 16:02
Day 1 // Making sketch models // Rhombus interlocking with each other.
Posted 9 May 2014 16:00
Material testing for the moulds.
Posted 9 May 2014 15:59
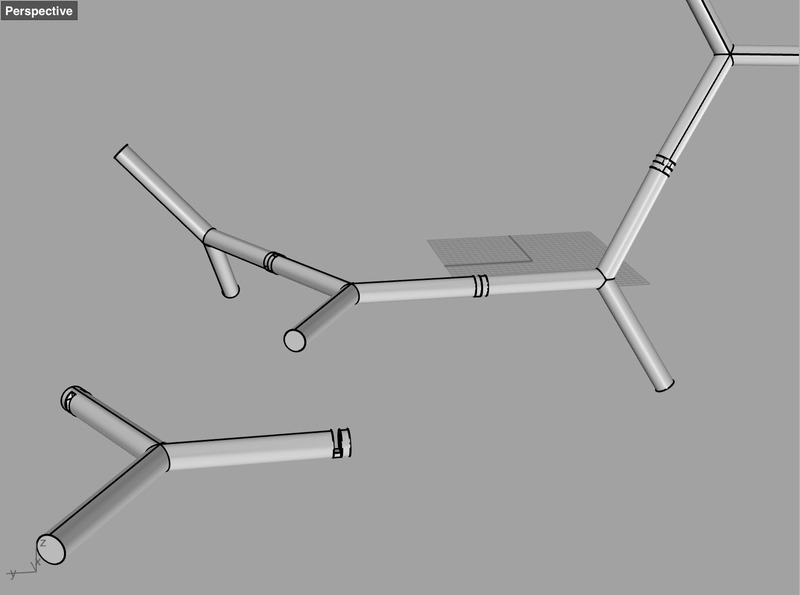
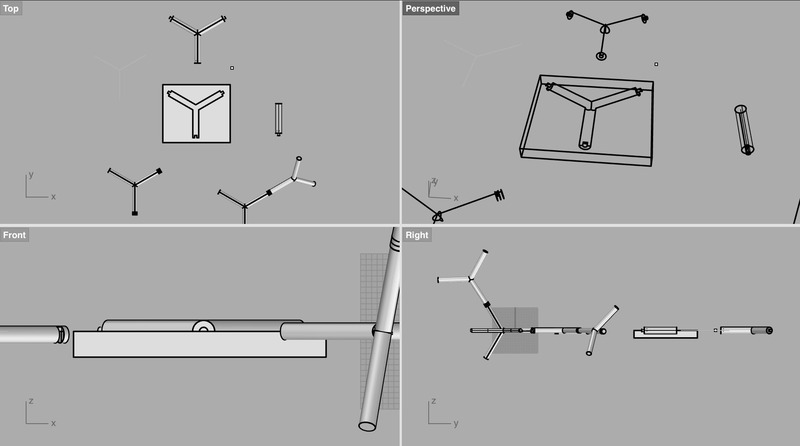
Using rhino for architecture
Posted 9 May 2014 15:59
Day 2 // Morning session // Rhino Tutorial // Learning basic commands such as Scale, Extrude, Array etc.
Posted 9 May 2014 15:47
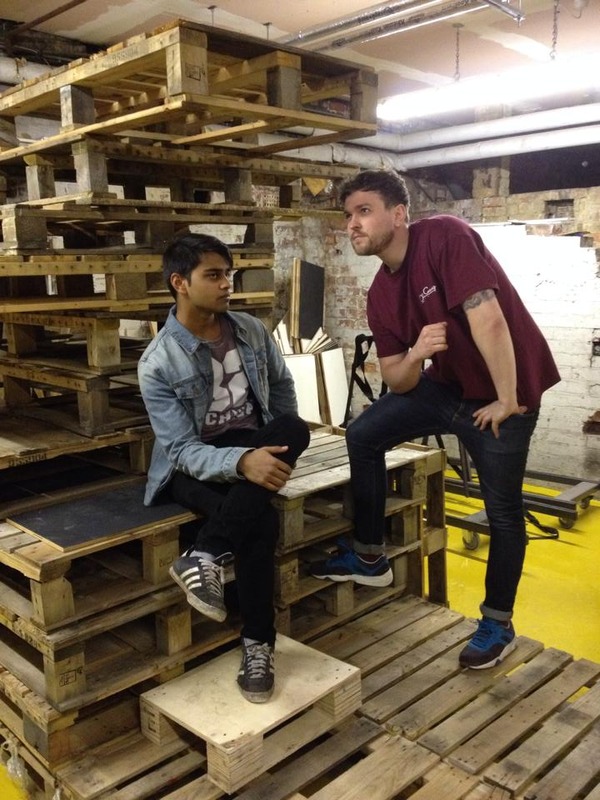
We discussed and tested what material we thought was best to get the idea of the structural frame across and then packed the pieces up into a neat pile to finish the day.
Posted 9 May 2014 15:47
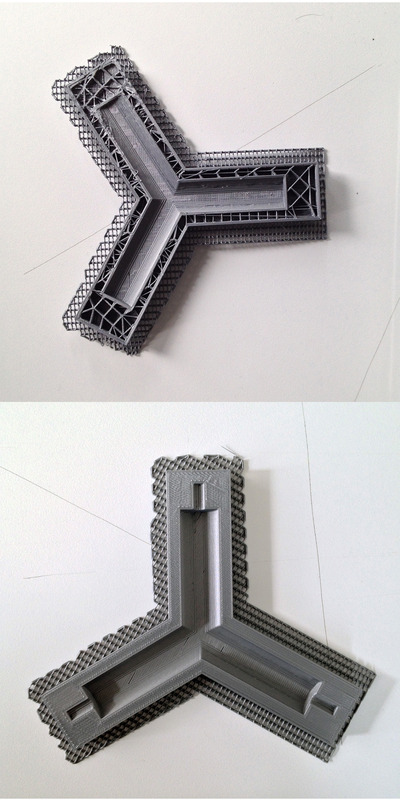
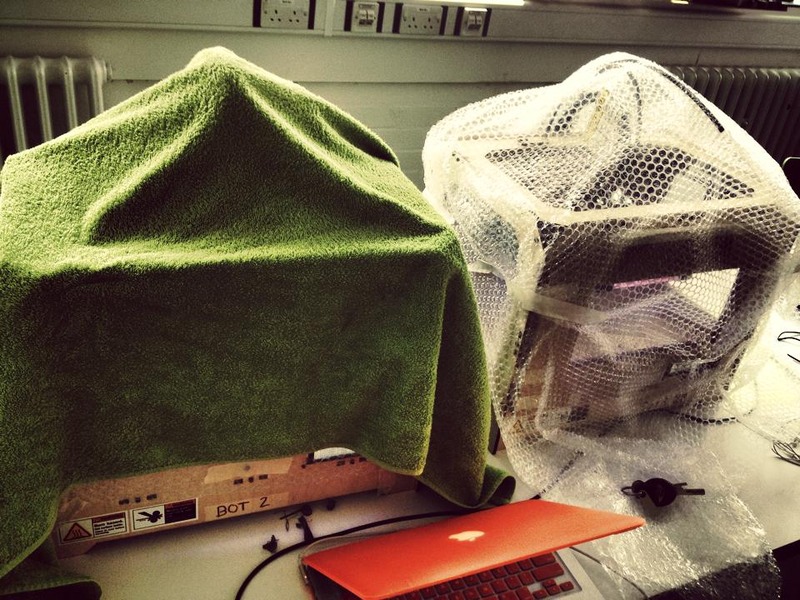
The first mould broke because the temperature in the printer was not the same all the time, and it started distorting. The second one came out perfectly after we wrapped the printer in a towel.
Posted 9 May 2014 15:37
Testing materials, including resin, latex, and plaster
Posted 9 May 2014 15:28
Mould 3D printed correctly
Posted 9 May 2014 15:28
Day 3, models that we all made
Posted 9 May 2014 15:23
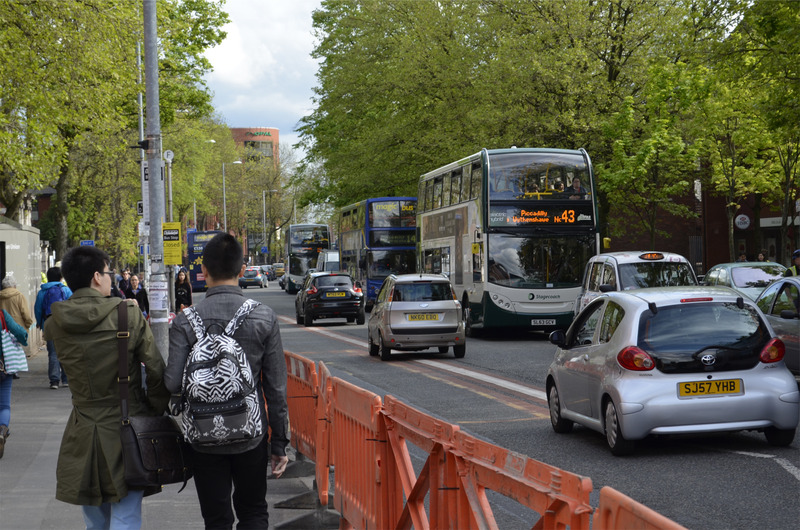
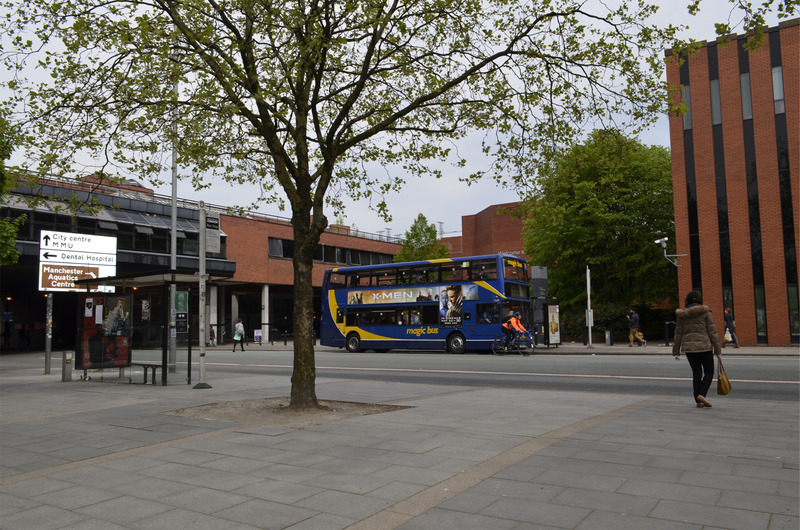
After feedback from the fifth year students, we went back onto oxford road to gather more data regarding transport, looking at areas such as traffic flow and congestion. This photograph was taken outside the Manchester Royal Infirmary building.
Posted 9 May 2014 15:13
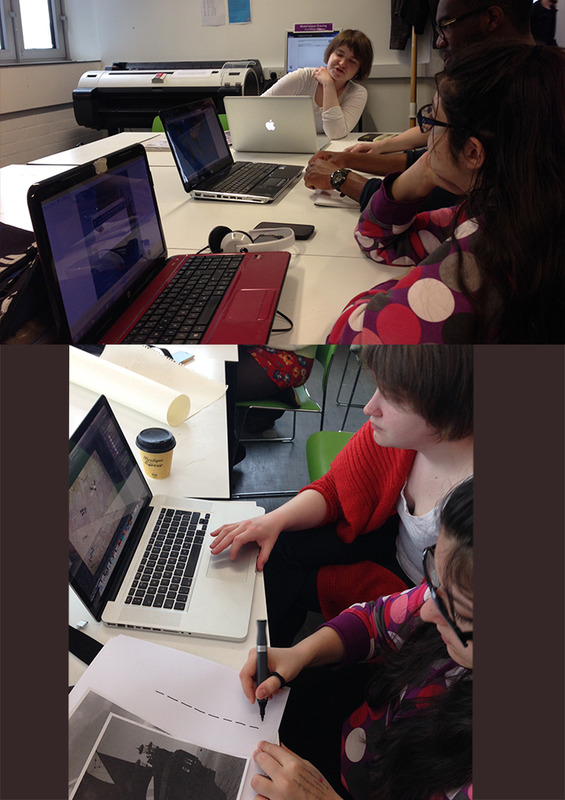
After a lecture from Ulysses Sengupta regarding ways in which we can map and visualise data, we spent the day discussing out findings with the fifth year students, and proposing how we would develop our process. We also looked at precedents regarding types of graphic representation.
Posted 9 May 2014 15:11
On the first day, we were split into smaller groups that would focus on different areas of information to map along Oxford Road. Our team was focusing on transport, I chose to map data and statistics regarding bus stops, the one pictured is opposite University Place.
Posted 9 May 2014 15:09
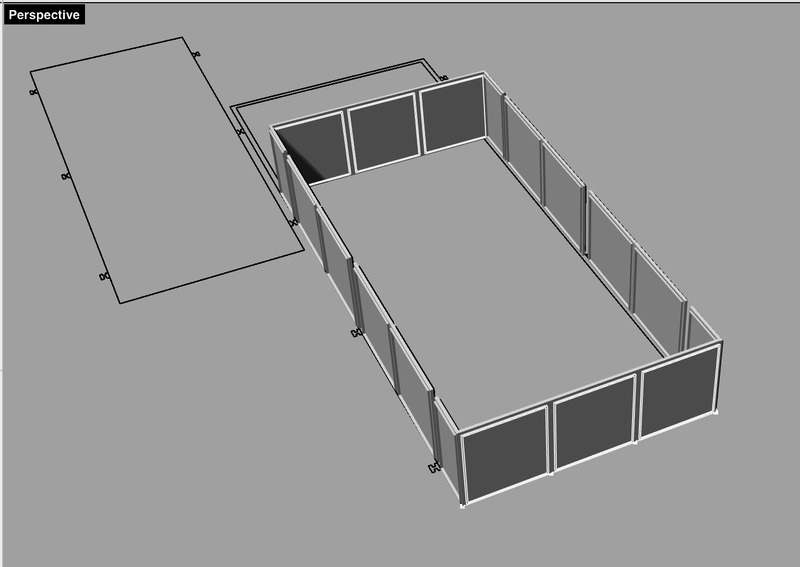
This shows part of the process in making the underneath of the structure and how each panel will connect up by tightening a thread of string.
Posted 9 May 2014 15:03
Day 5 (9/5/14) : Experimenting with different casting materials; resin, latex and plaster.
Posted 9 May 2014 14:57
Today we started making the prototype model for our floating temporary structure. We chose foam board for the base and sides as it is lightweight, waterproof and it floats.
Posted 9 May 2014 14:54
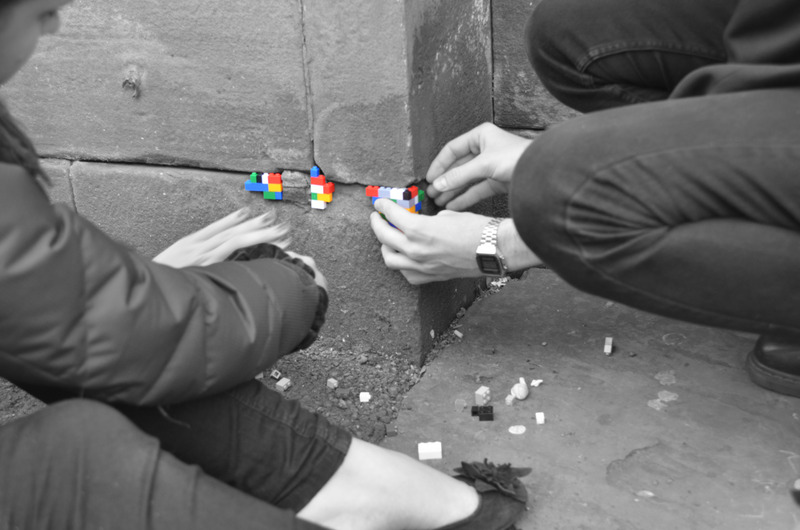
Group 11 lego intervention in All Saints Park area
Posted 9 May 2014 14:53
Beavering Ben + Successful Test Print!!!
Posted 9 May 2014 14:49
Day 3: using sketches and rhino to develop the components
Posted 9 May 2014 14:45
3D Printing the mould for the group project.
Posted 9 May 2014 14:42
Day 5. Experimenting with materials and techniques.
Posted 9 May 2014 14:40
Day 5 3D Printing: The 'Twin Towers'
Posted 9 May 2014 14:39