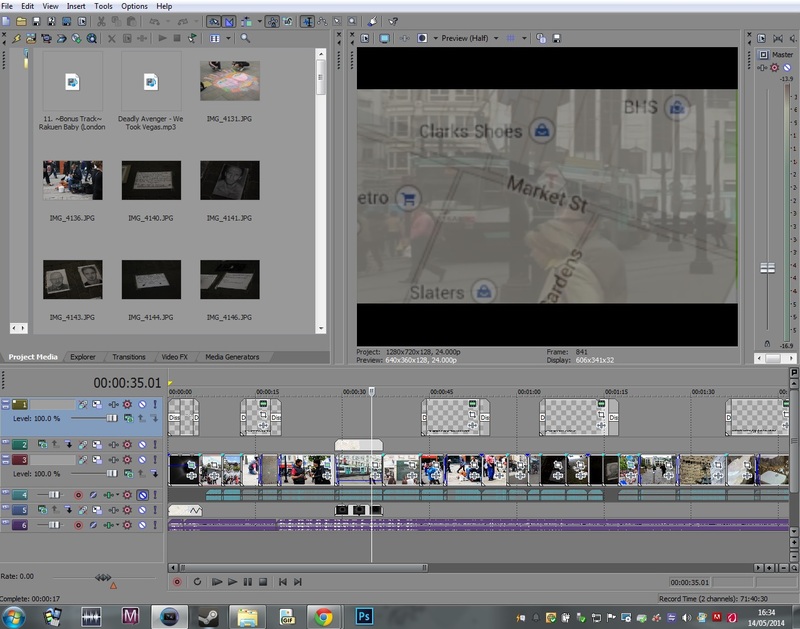
event 10 // day 6 // working on final output
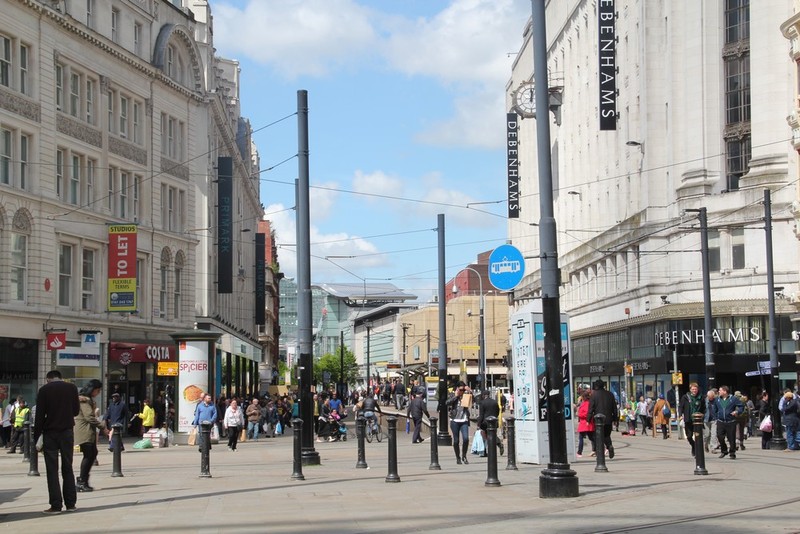
Spent the day filming people in Market Street. Working on the video for the final output.
Posted 14 May 2014 20:38
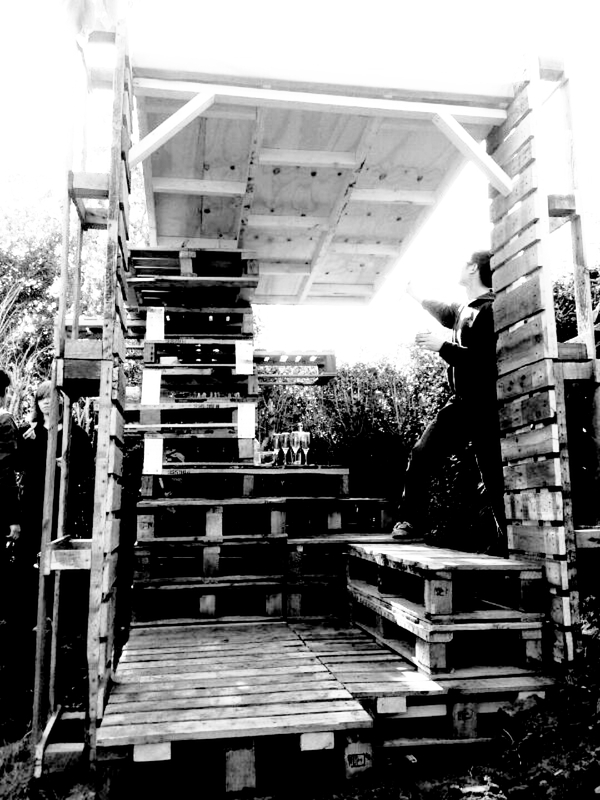
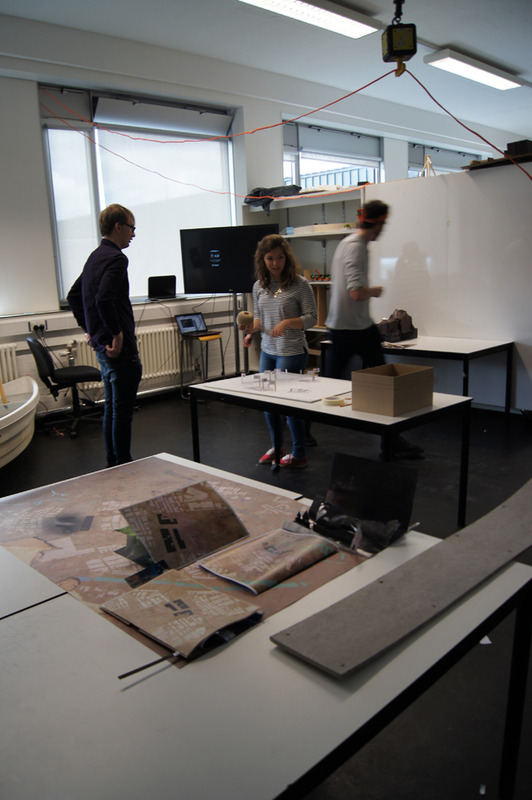
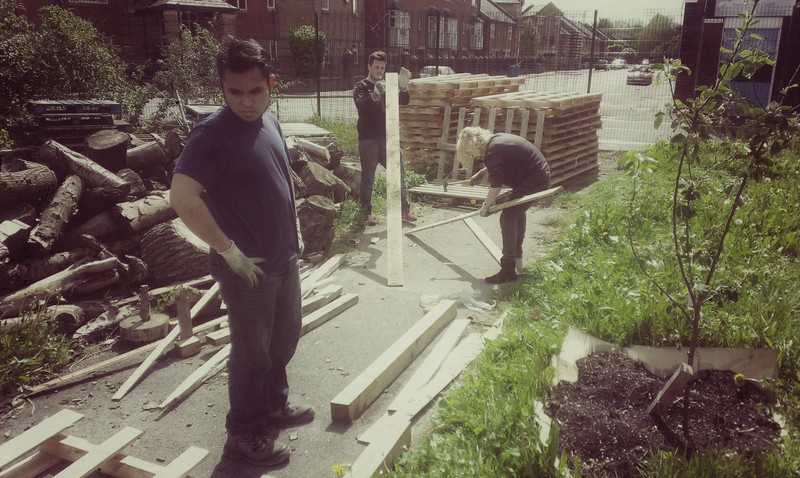
Session 5: Experimenting with reclaimed materials.
Posted 14 May 2014 20:17
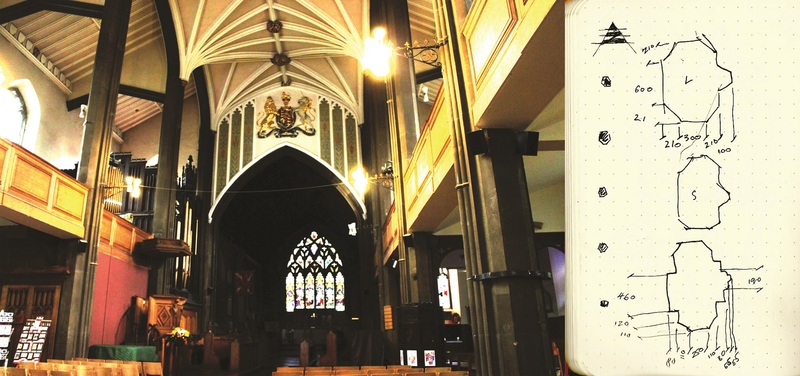
Adding textures onto the elevations and plan with photoshop.
Posted 14 May 2014 20:16
05: If and Else experiment - Local rules are not independent. Through interactive experiments it was understood that there are a number of external components that influence such scripts (when applied to real life scenarios).
Posted 14 May 2014 20:14
Day six:
On Tuesday we took our "wearable shelter" to Grumpy, where all the participants to the event exhibited their designs.
Posted 14 May 2014 20:00
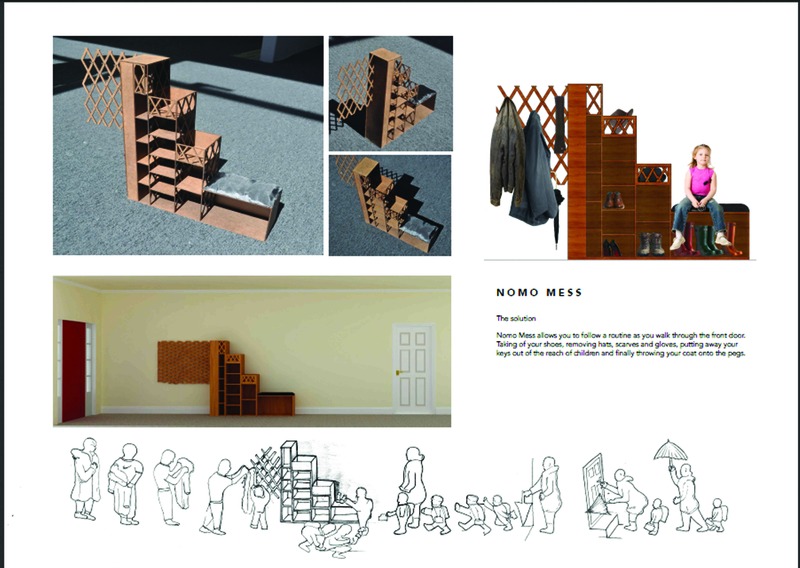
Day 6 - The final day of events began with adding finishing touches to the model. It was then photographed and these along with the visuals created over the past sessions were arranged on the final panels which we used in our presentation at the end of the day.
Posted 14 May 2014 19:58
Day 5 - The morning was spent making final adjustments to the visuals and document for the laser cutter which we used in the afternoon. After the pieces we cut we stained the wood and began assembling the model.
Posted 14 May 2014 19:54
Day 6: We gathered every file needed in one document. We finished by laying everything out onto the two panels. We also had to create drawings on the connection and write up a description of our design. Lastly we presented our idea to the group with our presentation sheets.
Posted 14 May 2014 19:37
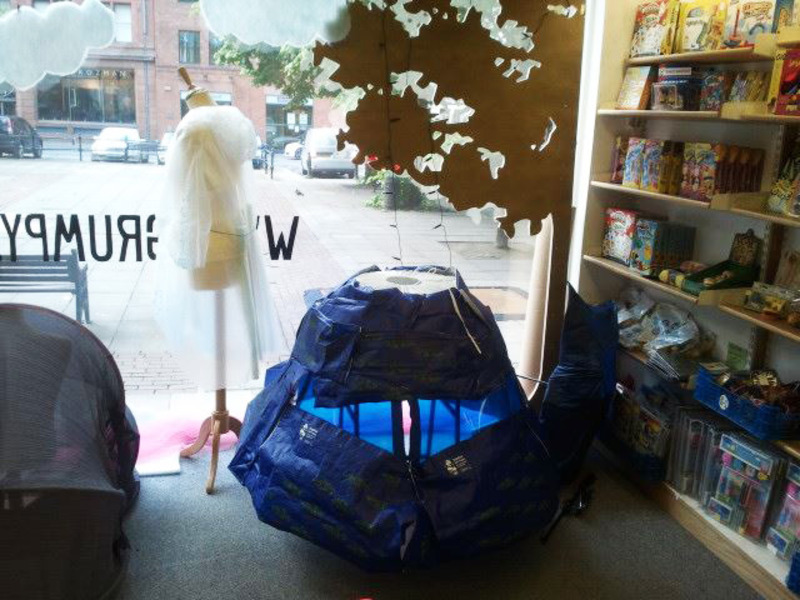
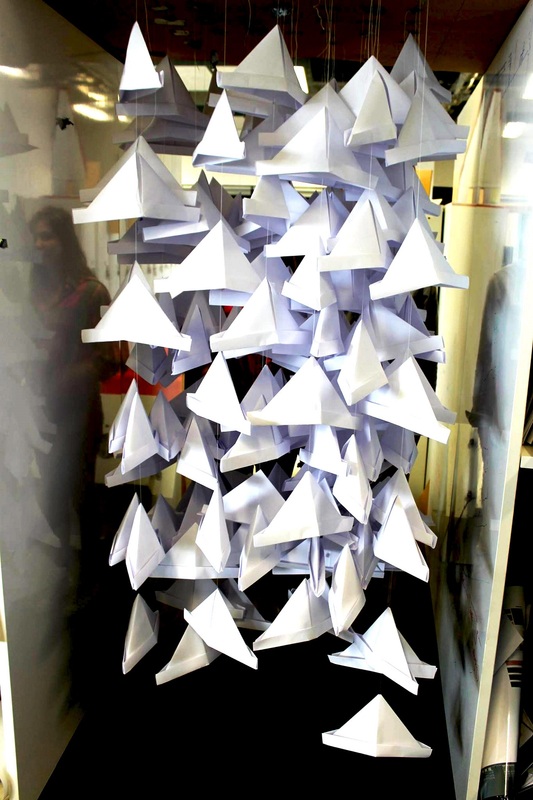
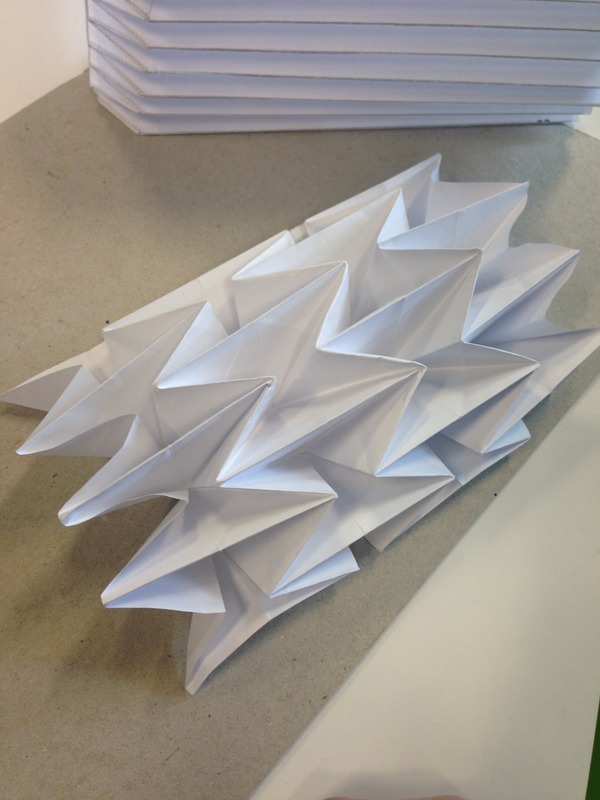
Folding and organisation of thousands of hats to create the desired density. Once the concept was secured the production began.
Posted 14 May 2014 19:24
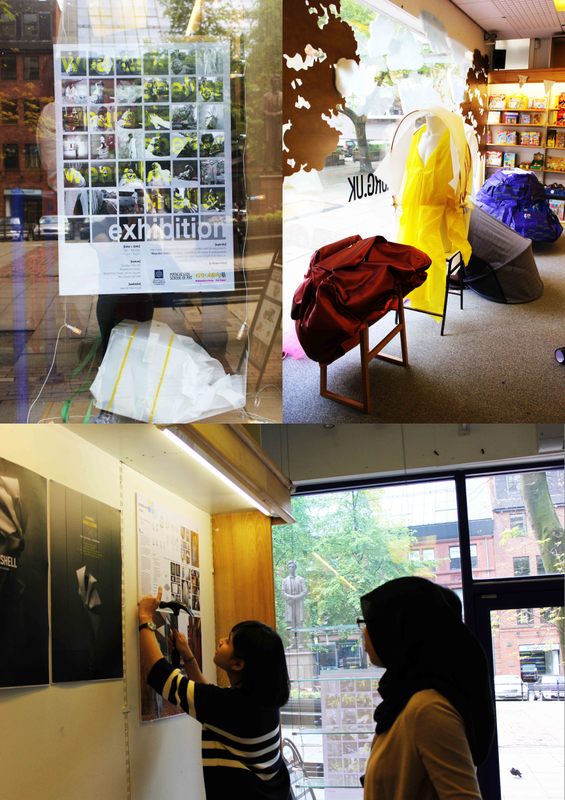
All the products are finished and ready for the exhibition.
Posted 14 May 2014 19:22
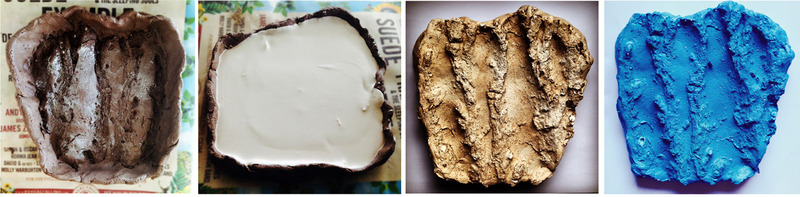
Day 3: Learning how to cast using clay and plaster.
Posted 14 May 2014 19:16
The day was spend presenting the various design proposals for the Making Headway Catwalk to the collaborators and the client. The final design was quickly chosen and discussions about the production process were underway.
Posted 14 May 2014 19:11
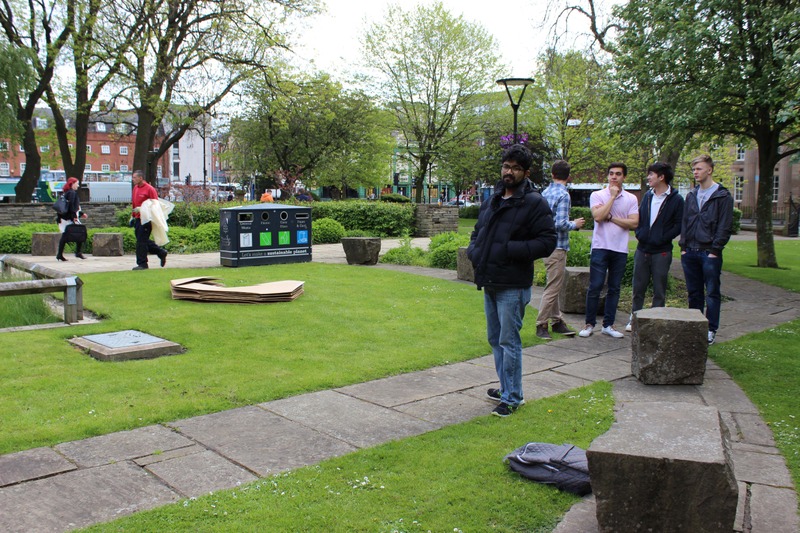
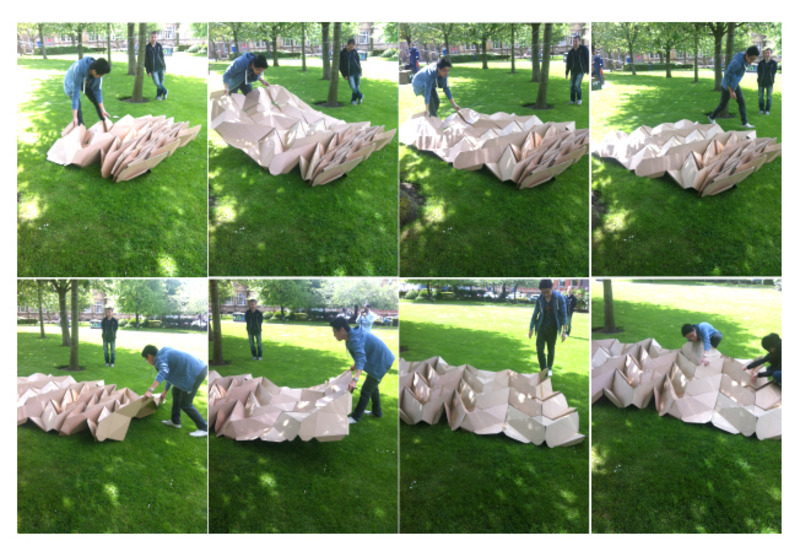
we finally tested the models by seeing if members of the public could deploy the structures
Posted 14 May 2014 19:04
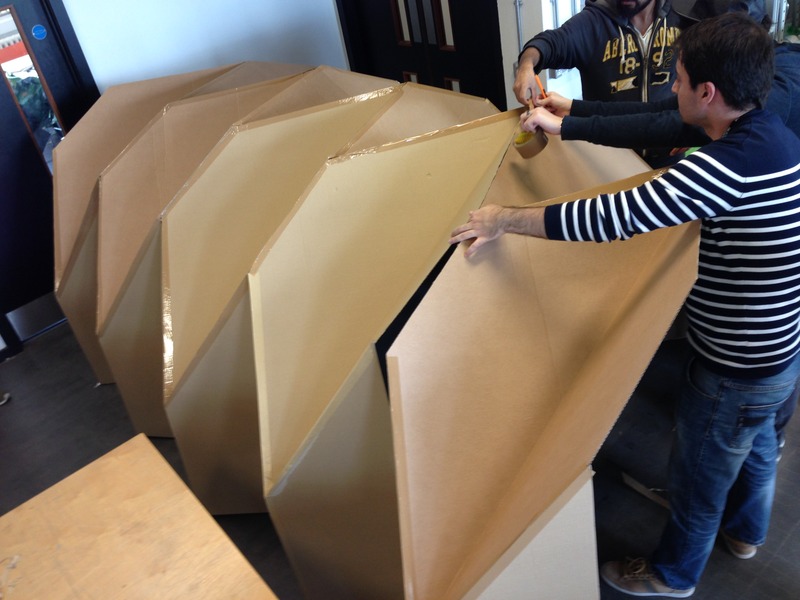
we stuck all the pieces together in the origami form to produce the emergency shelter
Posted 14 May 2014 19:00
The 3D model is completed and ready for final rendering.
Posted 14 May 2014 19:00
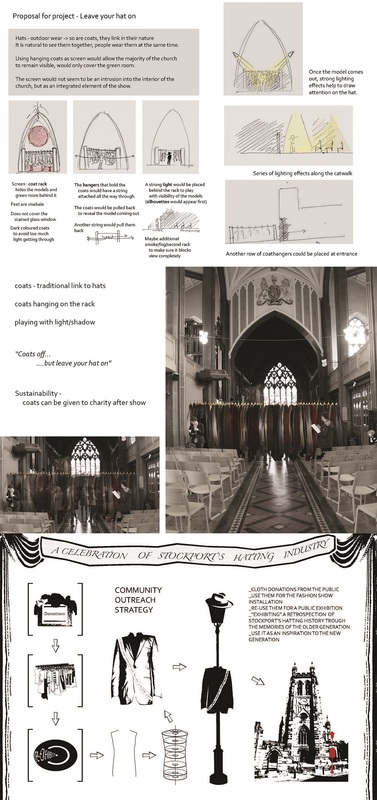
Site visit to St Mary's Church in Stockport followed by a tour of The Hat Works Museum to provide us with some inspiration to begin presenting ideas for the backdrop of the hat fashion show to take place in May.
Posted 14 May 2014 19:00
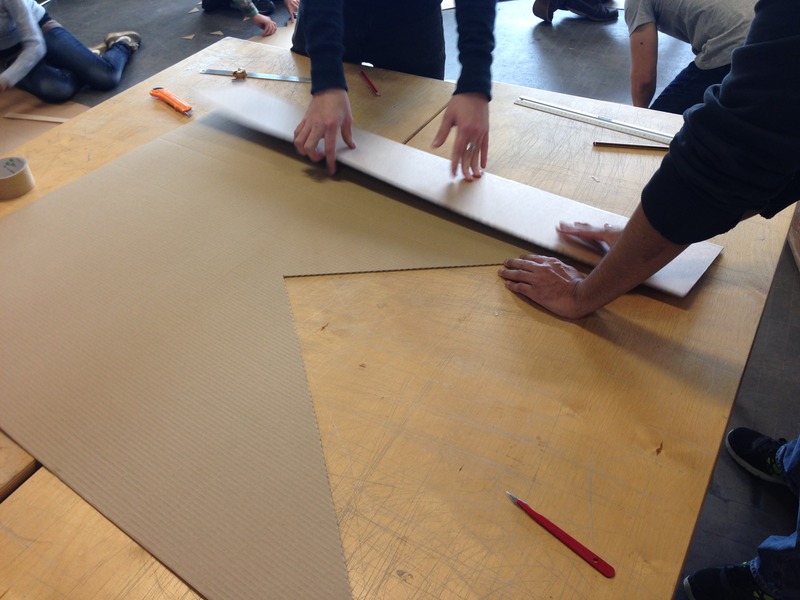
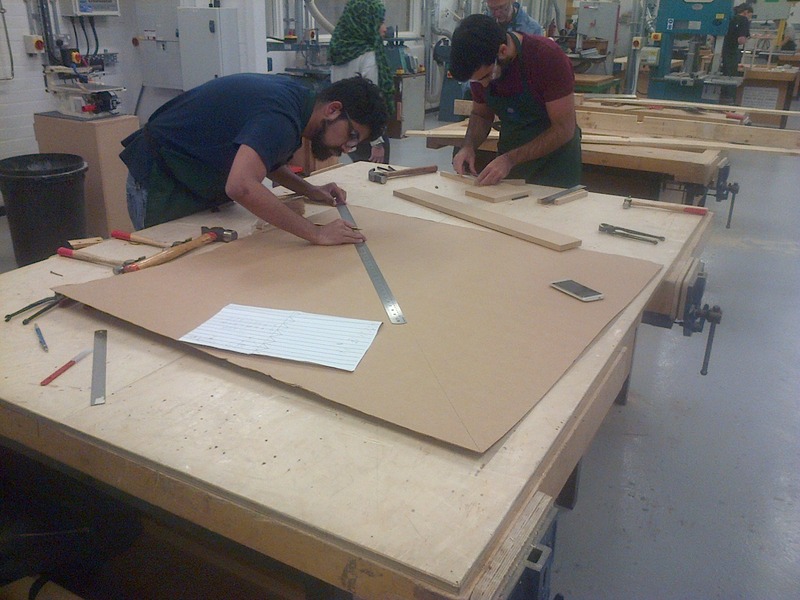
we cut out the two repeated pieces and used them as templates for the next 8 pieces
Posted 14 May 2014 18:57
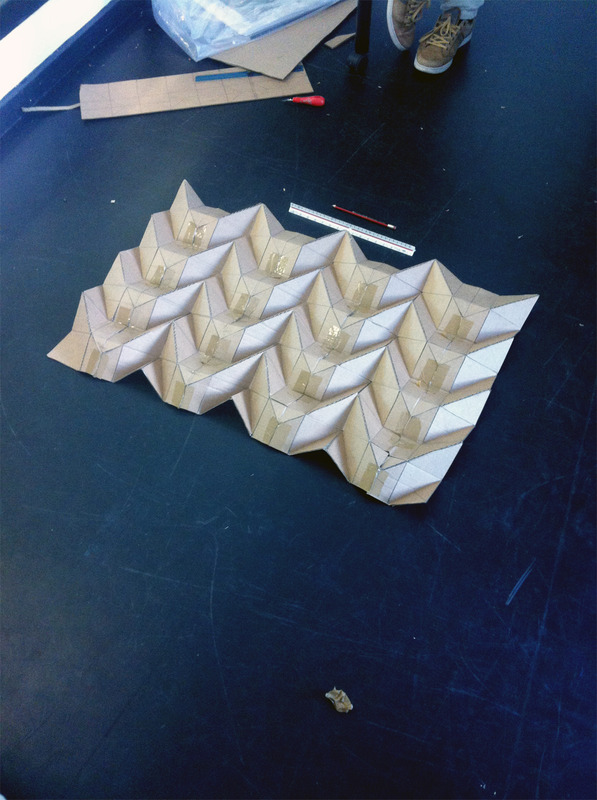
we used our maths skills to measure out and scale up the pieces of our model at 1:1
Posted 14 May 2014 18:56
We each decided, in our smaller groups, on specific designs to develop
Posted 14 May 2014 18:54
We started by having a go at making all sorts of crazy origami designs!
Posted 14 May 2014 18:51
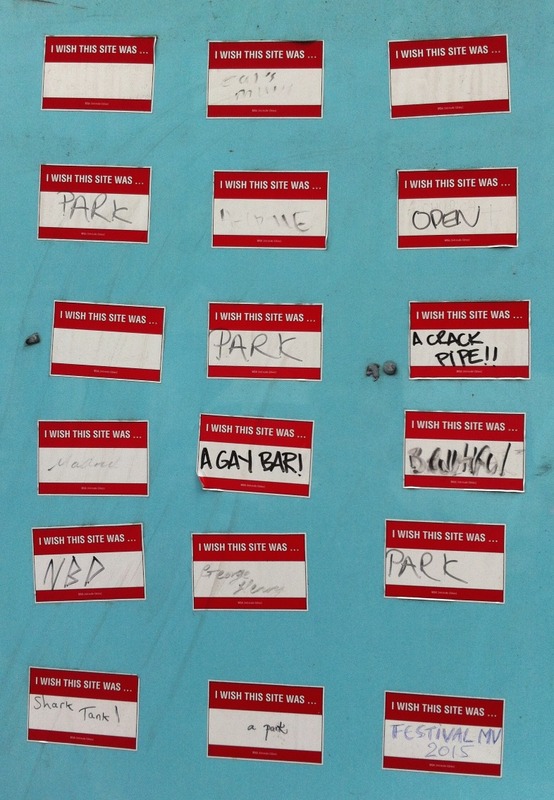
Day 01//Exploring stalled construction sites around Manchester, looking into ways they can be temporarily reappropriated.
Posted 14 May 2014 18:50
Day 04//Micromodelling around the MMU Campus
Posted 14 May 2014 18:49
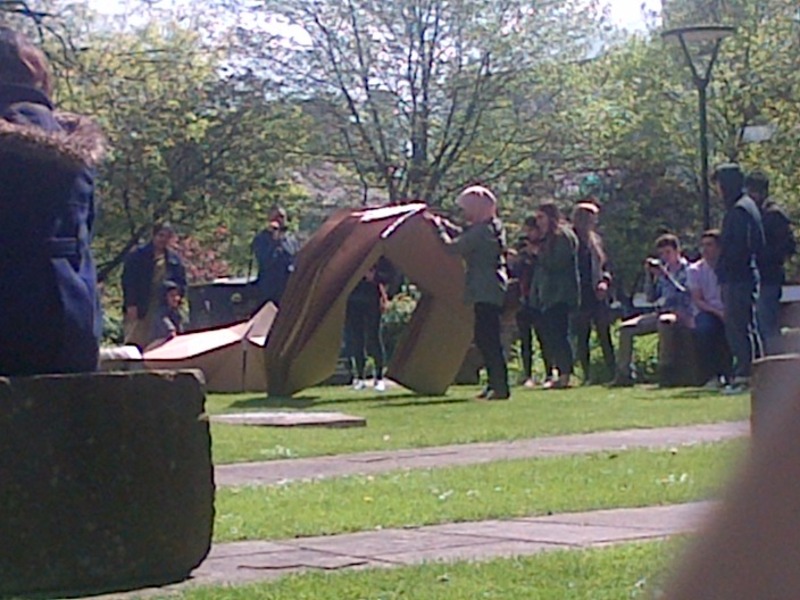
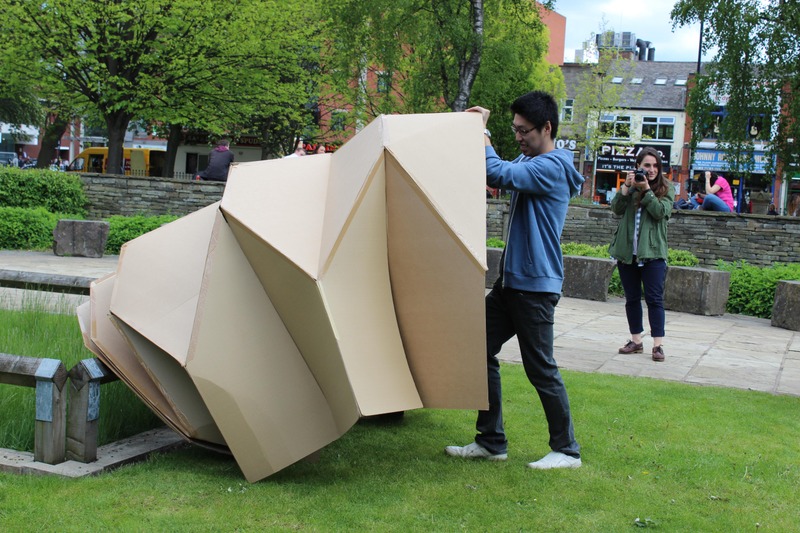
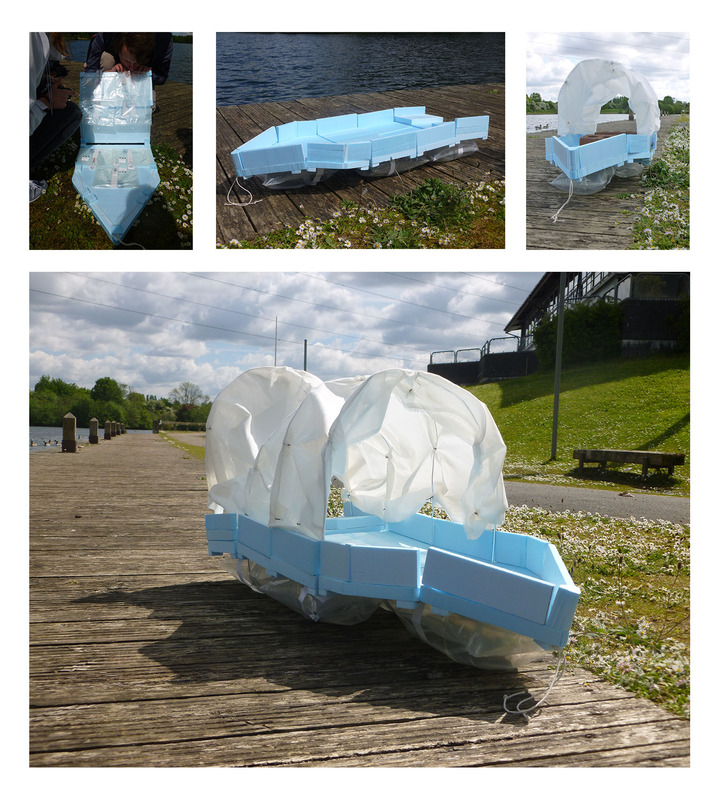
After we found a volunteer, he had a go at trying to erect the shelter!
Posted 14 May 2014 18:41
With our temporary shelter ready to test out, we took it to All Saints park and looked around for some people who could have a go at trying to erect the shelter.
Posted 14 May 2014 18:39
Day 10 Afternoon
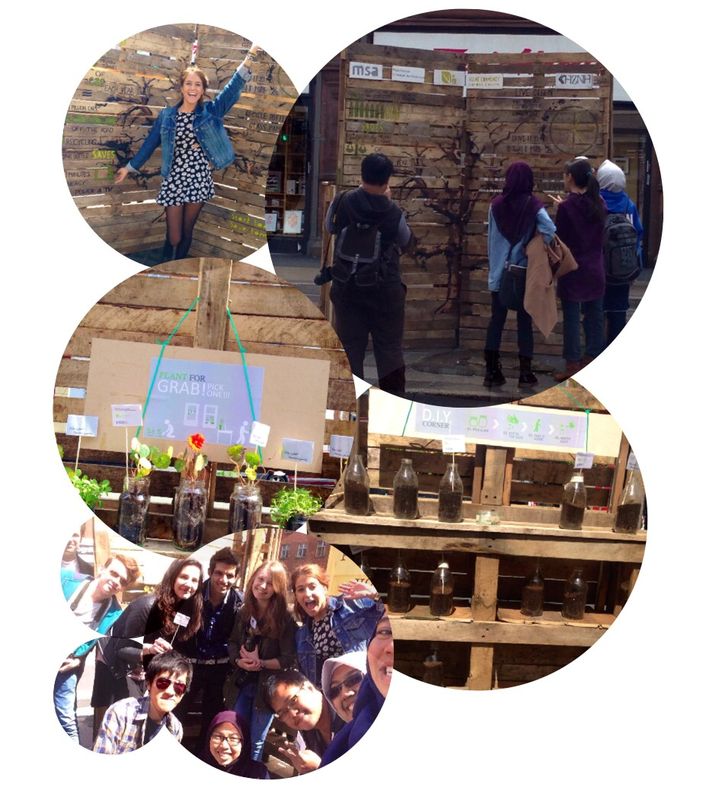
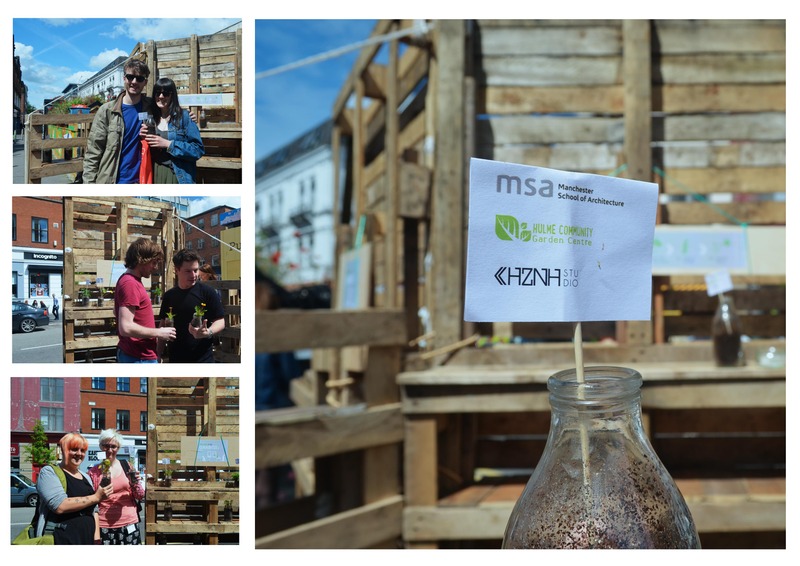
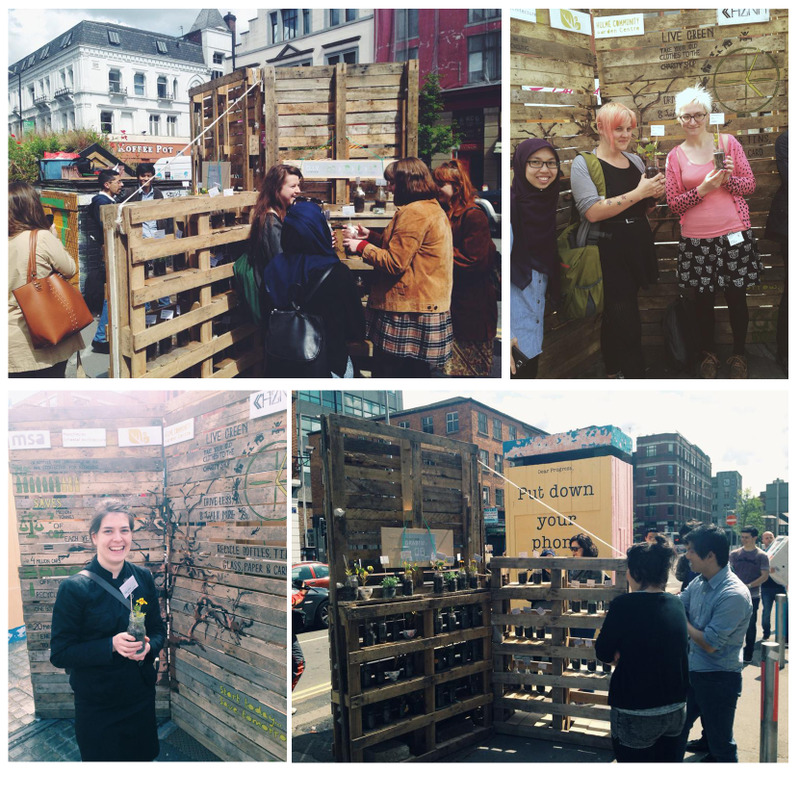
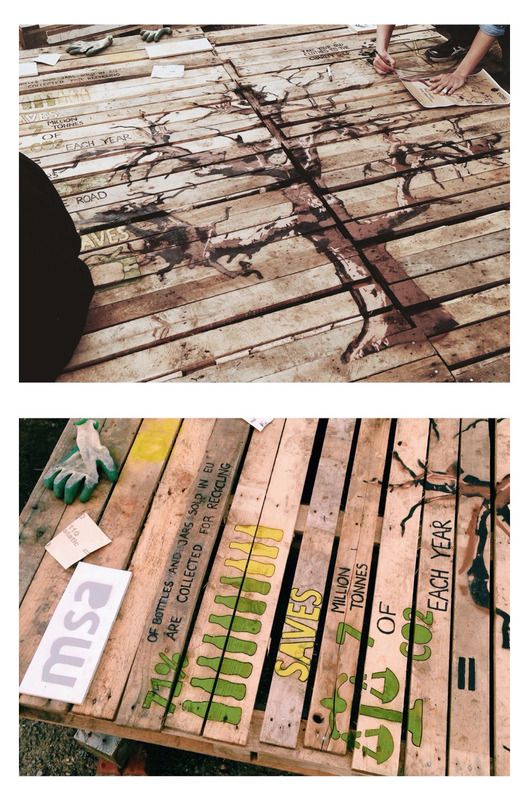
Informing the public about green issues and encouraging urban gardening by giving away sunflowers, nasturtium and french marigold.
Posted 14 May 2014 18:27
VI
Our Events experience ended with an exhibition, where we exposed our garments and our presentation sheets, along with our fellow colleagues. It was exciting to see our work in the shop and discuss with others about its impact, finalising a fun and engaging experience for all of us.
Posted 14 May 2014 18:25
Day 10 Morning
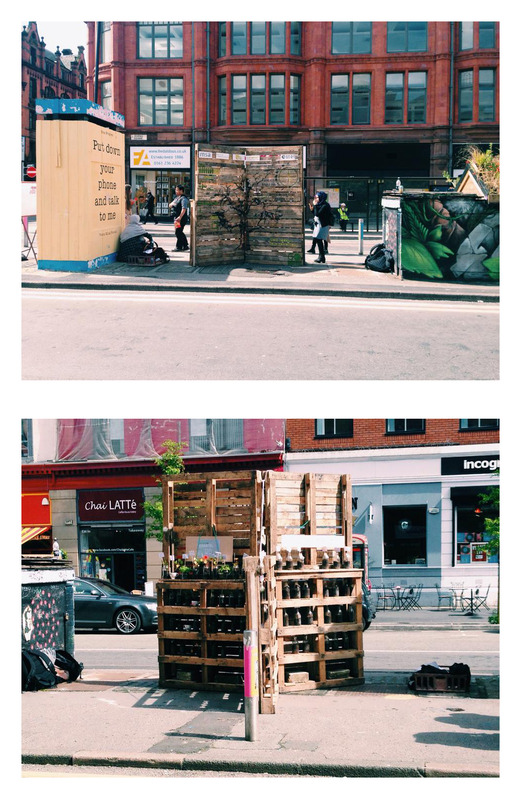
Installation workshop is moved to our site; Stevenson Square and ready to be engaged with the public.
Posted 14 May 2014 18:24
Public engagement- encouraging people to do home gardening, giving out the plants...
Posted 14 May 2014 18:24
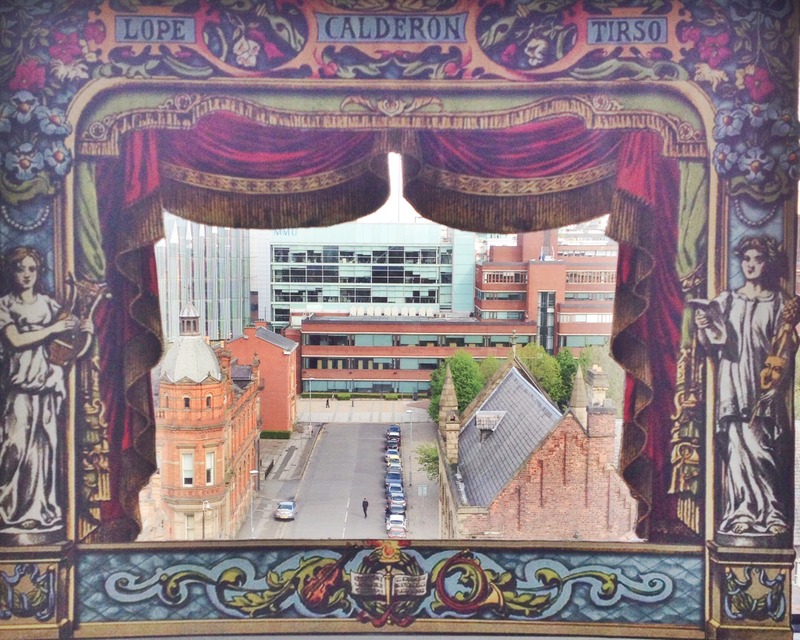
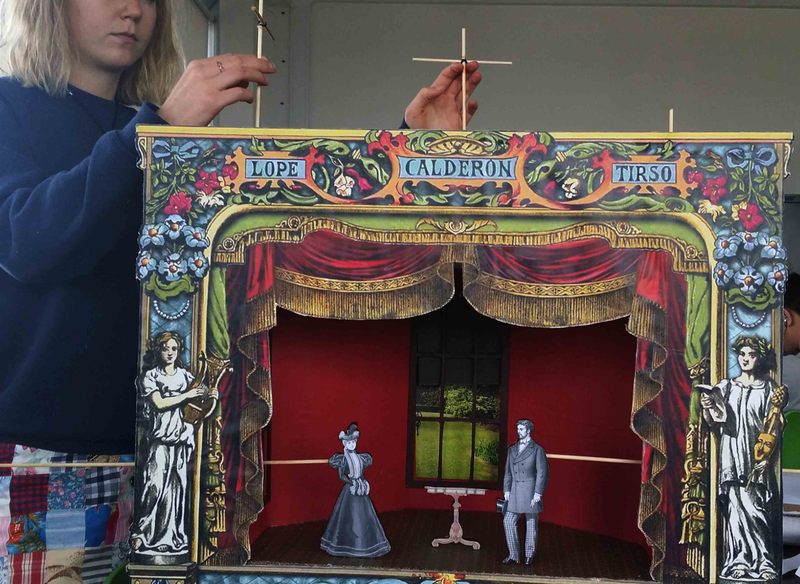
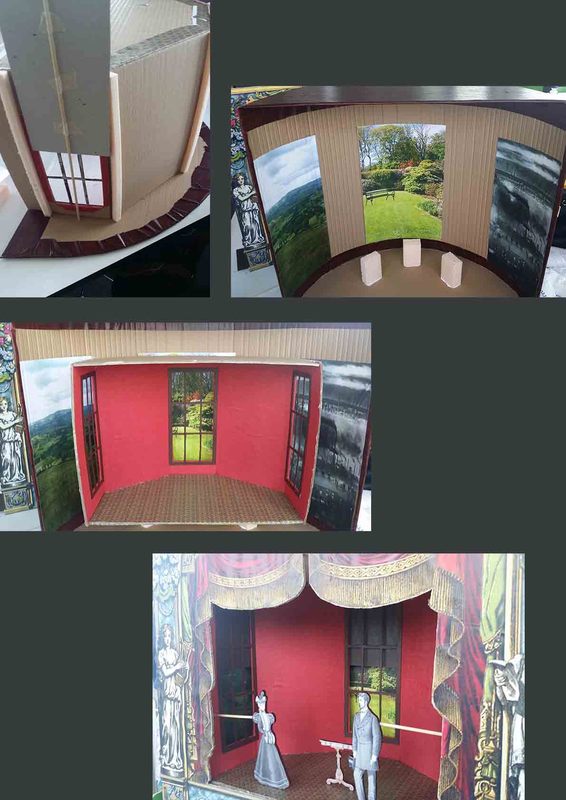
The final model- representing a view from Elizabeth Gaskell's dining room bay window and the three views that may have inspired her. The model is a take on a victorian style toy theatre and contains moving shutters to control which views are visible and moving characters
Posted 14 May 2014 18:13
creating views using a victorian style miniature theatres frame
Posted 14 May 2014 18:10
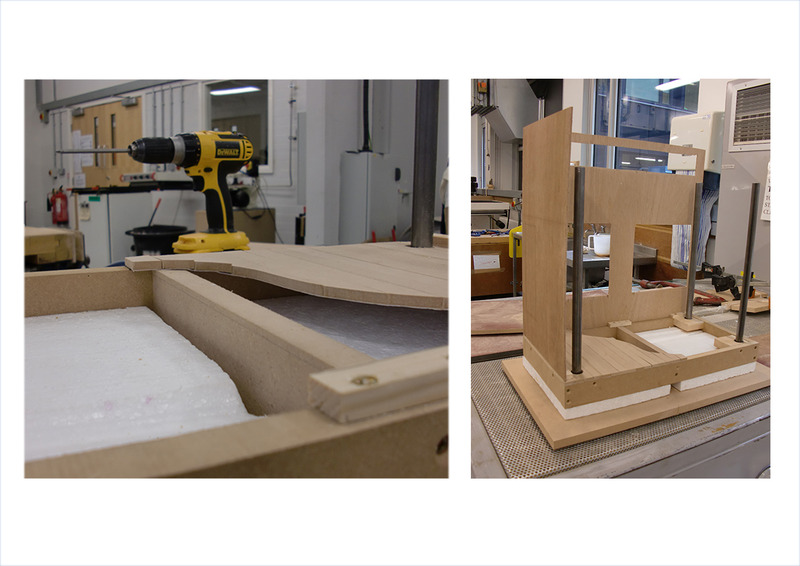
Assembling our final model
Posted 14 May 2014 18:09
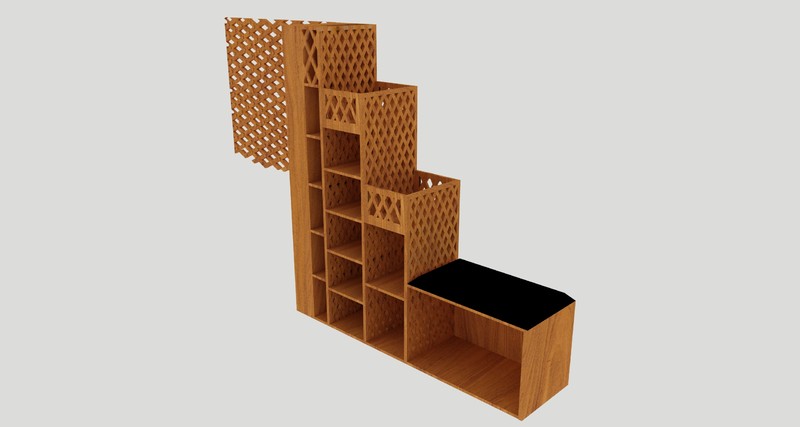
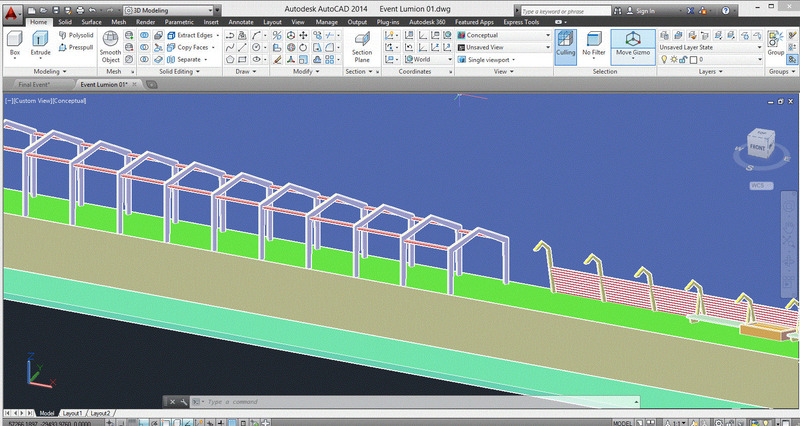
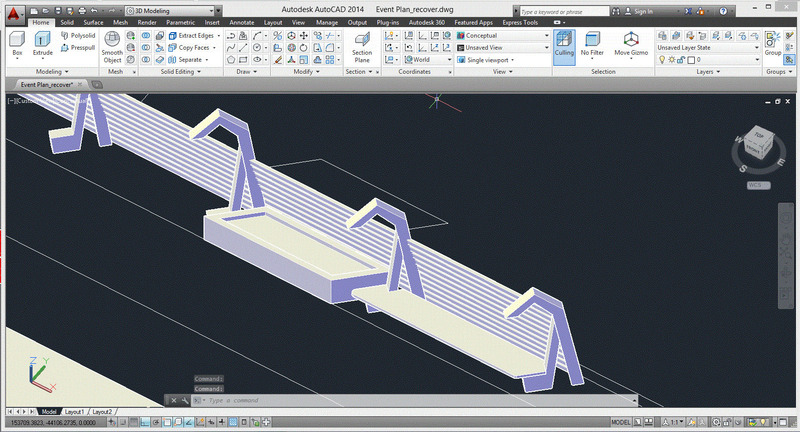
Creating the final 3D model, using AutoCAD 3D, for the final presentation.
Posted 14 May 2014 17:58
Event02 Pavilion Installation
Posted 14 May 2014 17:57
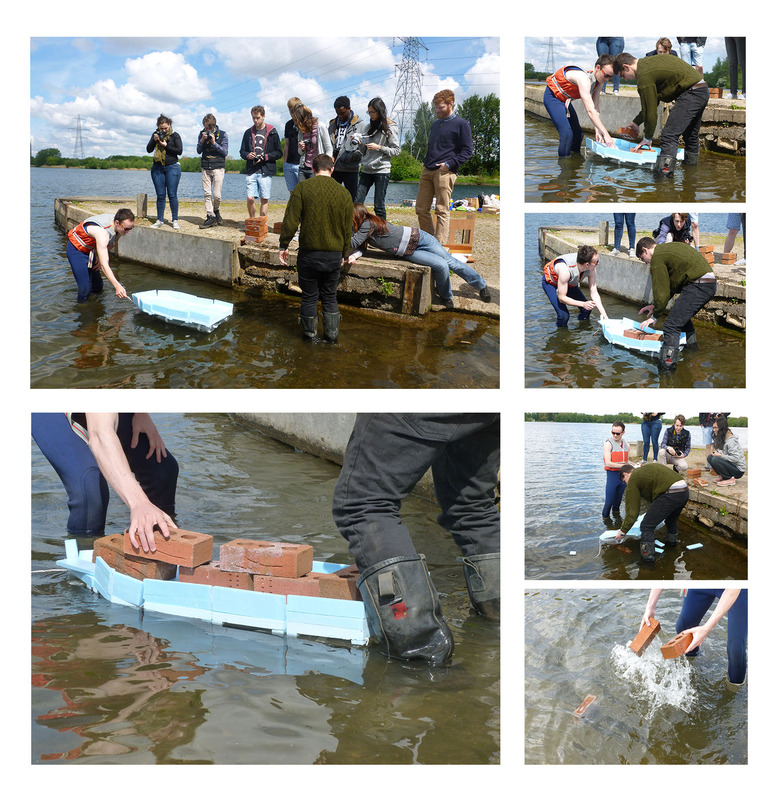
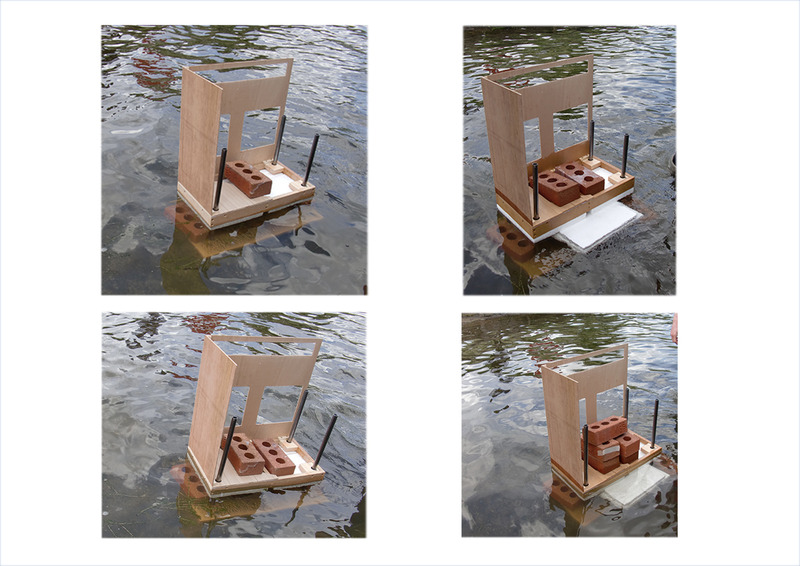
Event 15 / Testing models at Sale Waterpark /
Group 3: model sank under the load of 10 bricks.
Posted 14 May 2014 17:56
The 8th floor has been a hive of activity recently. Groups have been testing, modelling, and manufacturing their designs.
Posted 14 May 2014 17:52
Event 15 / Testing models at Sale Waterpark /
Group 2: model sank under the load of 3 bricks but after addition of more styrofoam it could support 5 of them.
Posted 14 May 2014 17:46
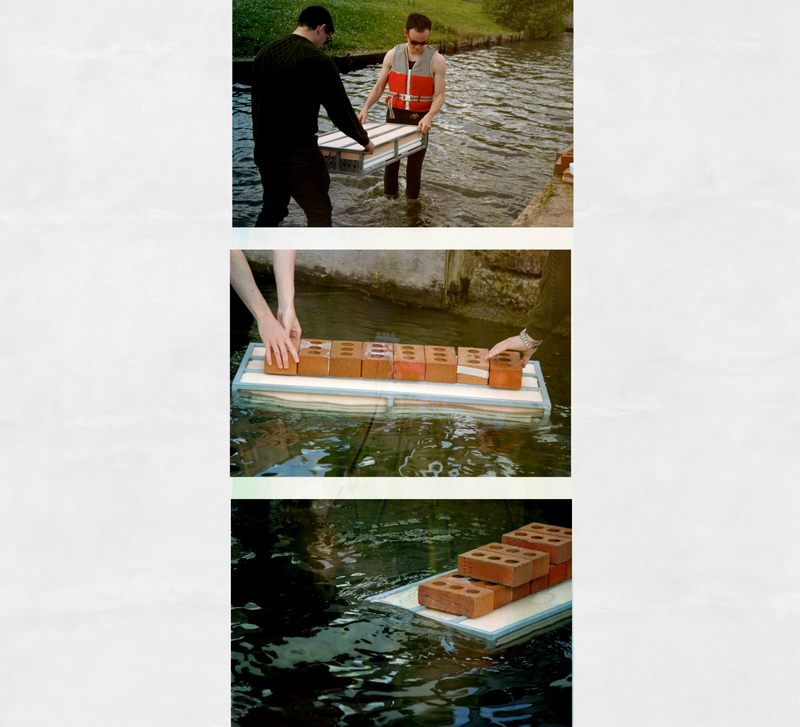
This shows the process of testing the weight from the brief today at Sale water park. It managed to withstand the weight of 6 bricks until it gave way.
Posted 14 May 2014 17:39
Inside Revolution De Cuba
Posted 14 May 2014 17:39
We fully assembled our prototype model today as it is to be assembled while the flooding occurs so it can be easily stored away and not be reminded. Ready to be tested.
Posted 14 May 2014 17:34
Our printed model inside and out
Posted 14 May 2014 17:34
Event 15 / Testing models at Sale Waterpark /
Group 1: model sank under the load of 6 bricks.
Posted 14 May 2014 17:33
Showing our theme and our map
Posted 14 May 2014 17:29
The shelter was held up with string against two trees, this kept the arch shape.
Posted 14 May 2014 17:29
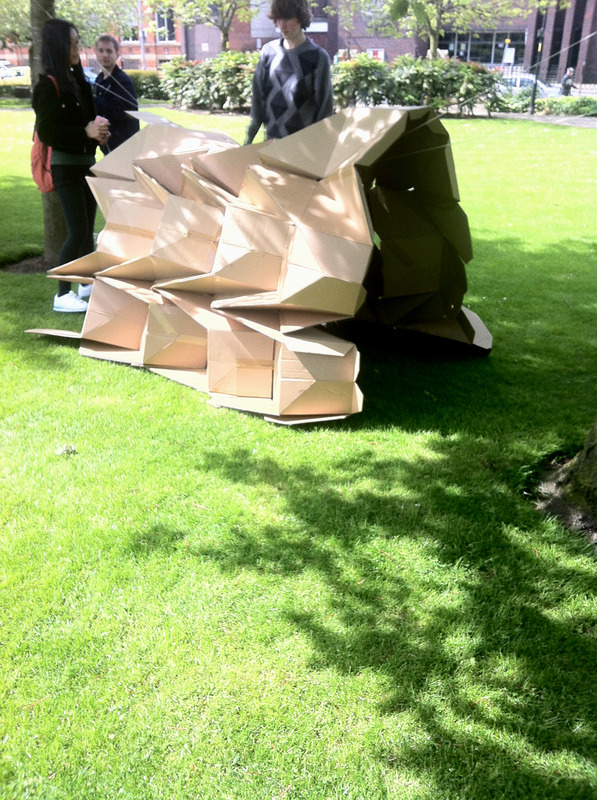
A smaller scale of the structure for the exhibition.
Posted 14 May 2014 17:25
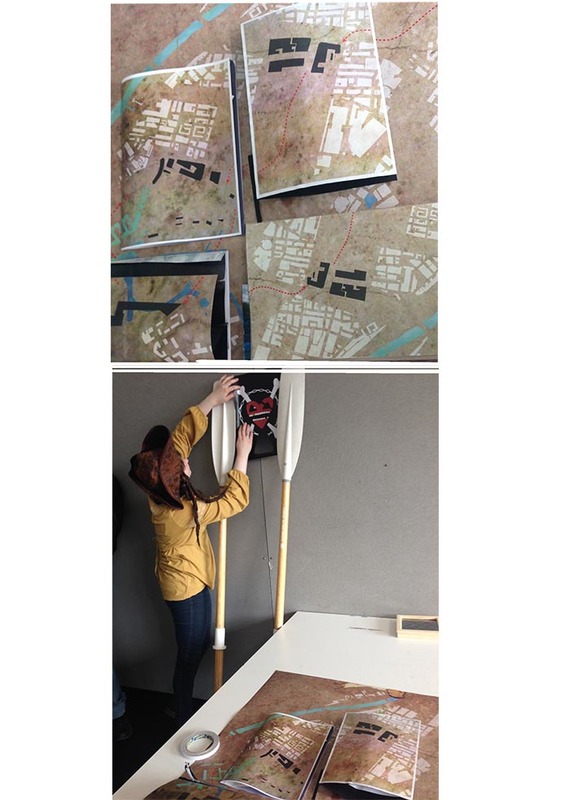
At the exhibition we presented our group narrative explaining the individual pop up maps each of us made. Hope our story will not be forgotten when we walk the plank to the other dimension! If we ever get back, we will make sure to put our adventures in a new map. Goodbye for now...
Andrea 'The fox' Piers
Posted 14 May 2014 17:24
Exhibition Day : All Crews getting ready for the exhibition
Posted 14 May 2014 17:18
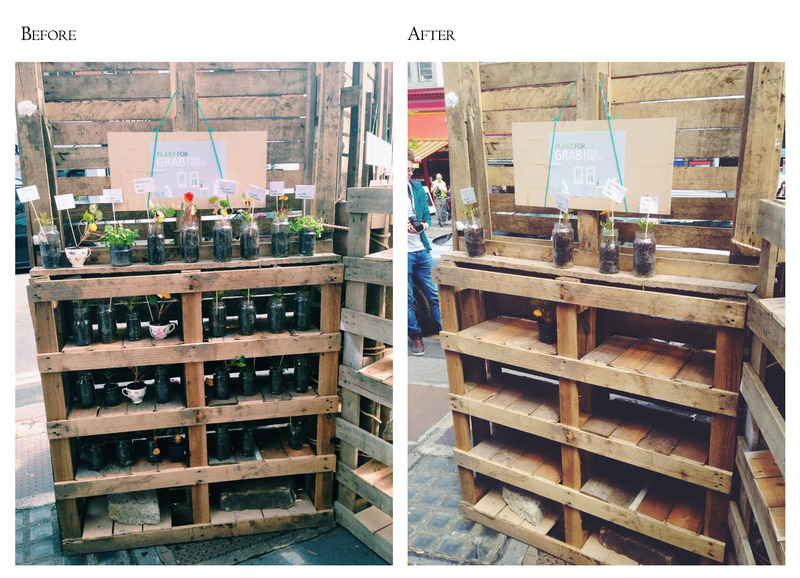
After two hours nearly all the flowers have been picked by curious visitors. Mission accomplished!
Posted 14 May 2014 17:16
The best part of the project is to see that all our efforts paid off. People enjoyed the whole idea of taking a flower home and appreciated the 3D installation.
Posted 14 May 2014 17:14
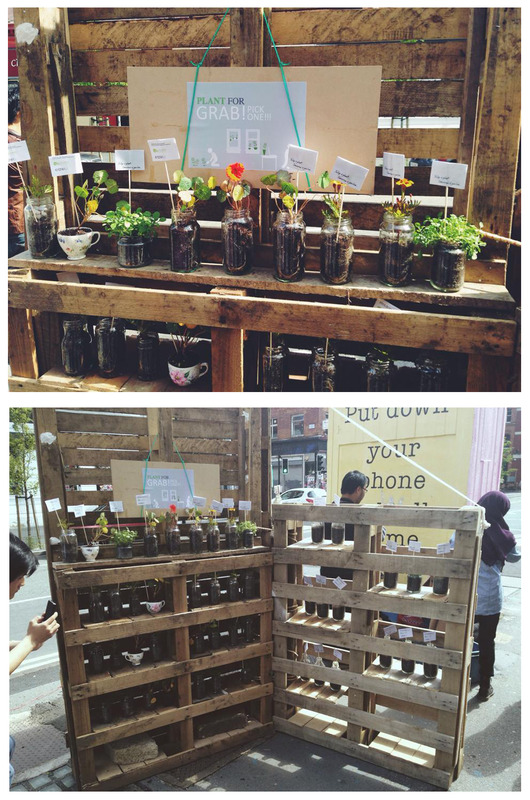
The flowers and the seeds are ready to be grabbed!
Posted 14 May 2014 17:11
DAY 7
.
We were making poster with information about mushfarm for the event day
Indivisually take each part to make and put them together and it will be printed out tomorrow
Also we cut open the bottles we put mushroom seeds in
Some of them are successful but some of them failed
But all will be presented on the event day!
Posted 14 May 2014 17:10
The installation assembled on site!
Posted 14 May 2014 17:10
Putting the finishing touches to the design on the last day off-site.
Posted 14 May 2014 17:09
On our last day off-site we planted the flowers and decorated the jars. Ready to be picked by their future owner!
Posted 14 May 2014 17:07
We went to All Saints Park to test how easy the shelters would be to assemble with members of the public.
Posted 14 May 2014 17:05
Final output
Posted 14 May 2014 17:00
Miniature theatre and window shutters making process
Posted 14 May 2014 16:57
12/05/2014
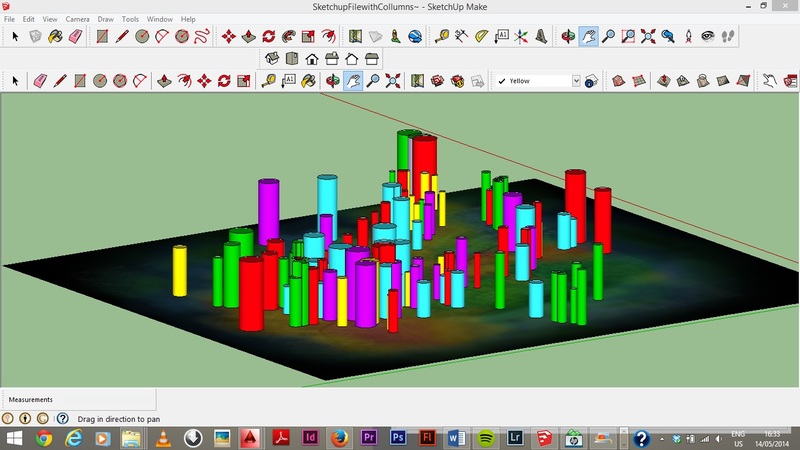
Another method of representing the data collected in 3d using Photoshop and Sketchup.
Posted 14 May 2014 16:47
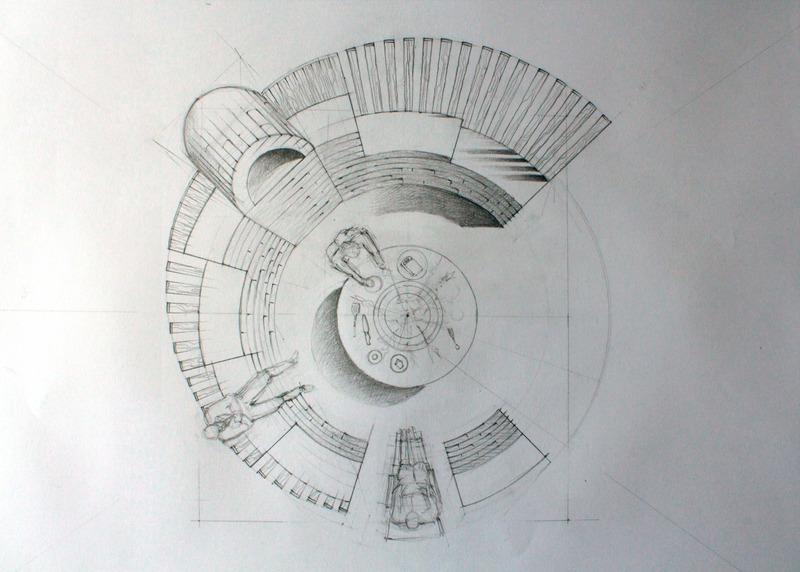
Plan perspective of the final design.
Posted 14 May 2014 16:45
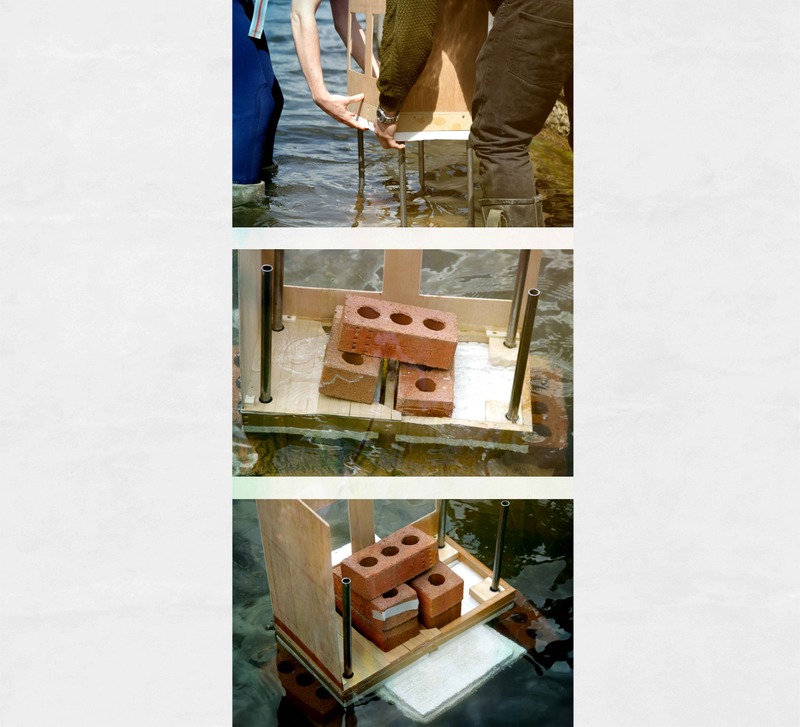
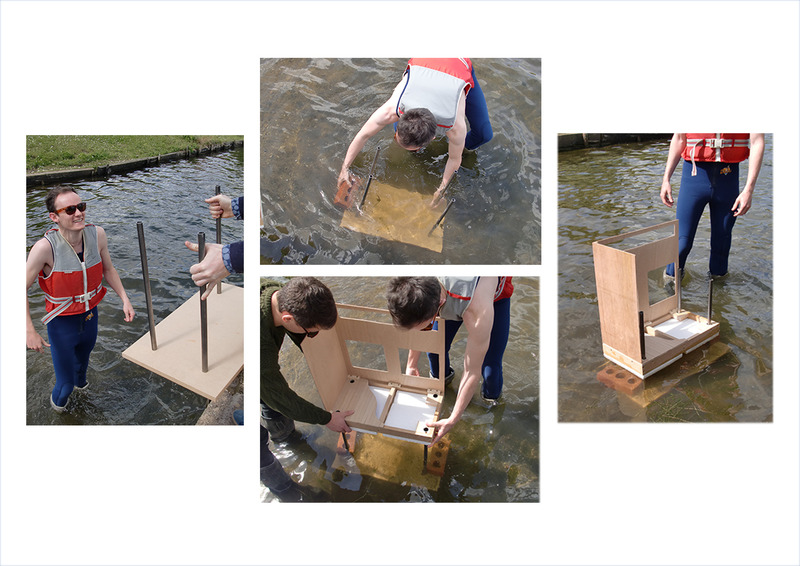
07b_ As nobody had drowned by this stage, we began to test how much our 1:10 model could support by using bricks. Our design was only able to support two bricks, but with the addition of more styrofoam it was able to support five bricks comfortably, even against the vicious tide.
Posted 14 May 2014 16:43
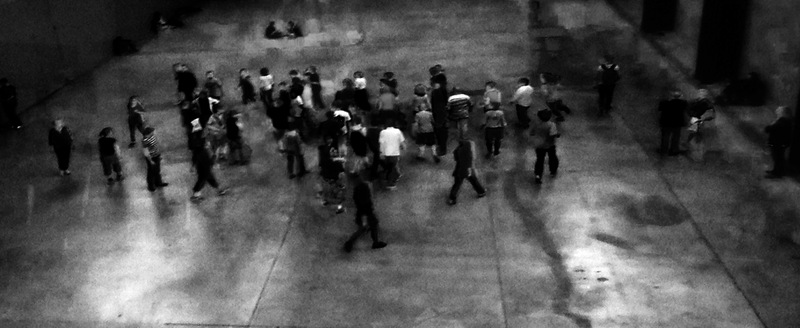
On the third day we were editing. The majority of the footage i used was from the filming but i did download some videos online for transitions between points of focus.
Posted 14 May 2014 16:38
Starting work on site.
Posted 14 May 2014 16:38
Material testing - mixing different proportions of water, sand and cement for each cup.
Posted 14 May 2014 16:36
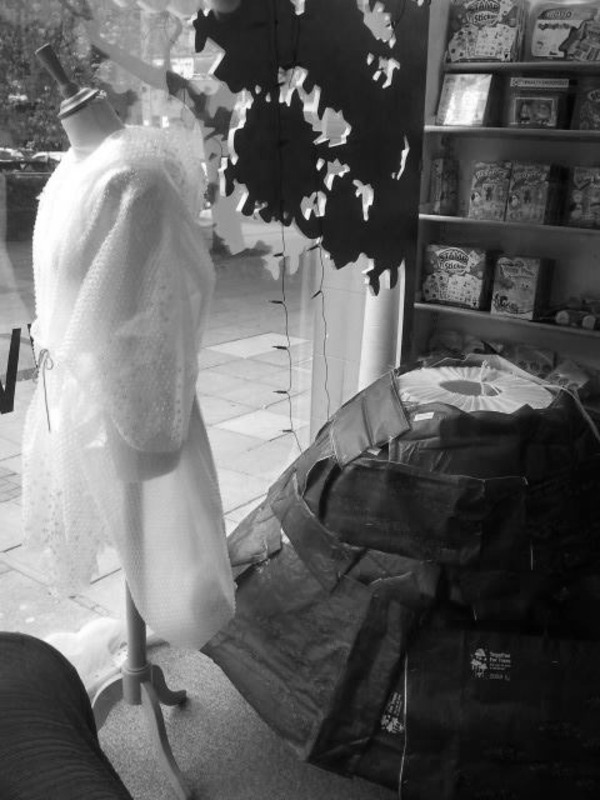
V
With our garment finished and constructed, we took it outside in an urban context and prepared our presentation. I was pleased to see how the garment resisted in the Mancunian weather and how it blended into the outdoor space.
Posted 14 May 2014 16:36
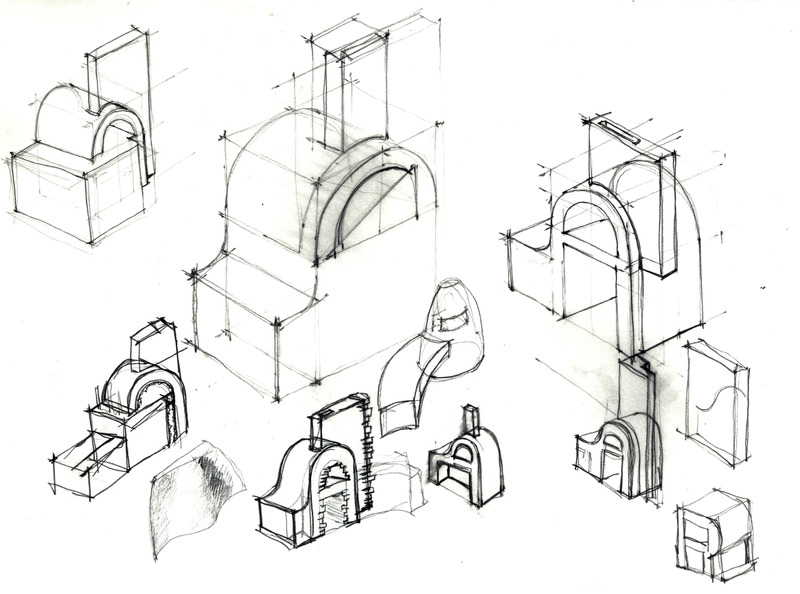
Developing the final design. Looking at ways of incorporating the chimney.
Posted 14 May 2014 16:33
07a_ Following the completion of our model, we took it to Sale Water Park to test. Such a dangerous environment required all the relevant PPE before entering the water- wellies, wetsuit and life jacket. The risk of drowning and hypothermia was then significantly reduced.
Posted 14 May 2014 16:31
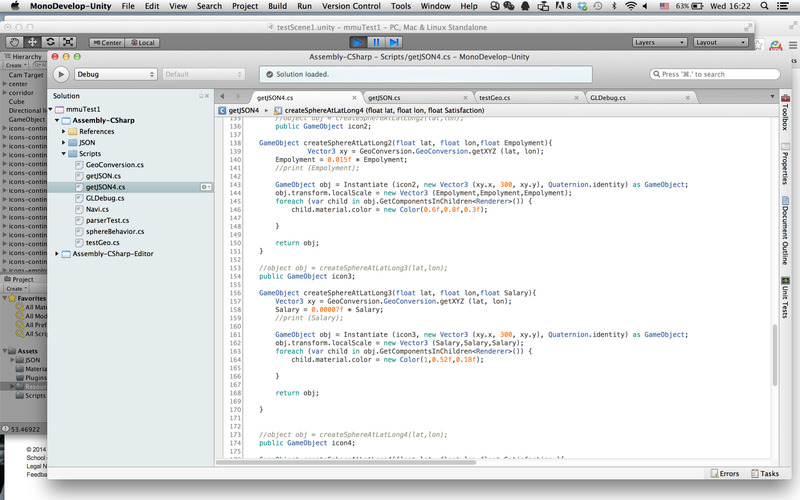
C# code translating value of object to volume size and colour categories.
Posted 14 May 2014 16:29
On the second day we went filming and i focused on seeing how people interact with spaces and how that use changes the space.
Posted 14 May 2014 16:26
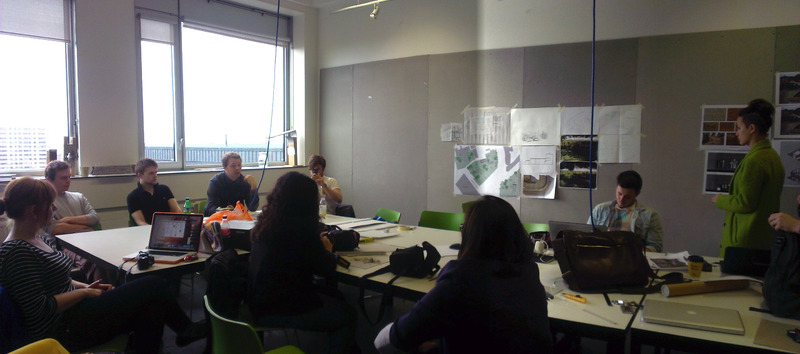
Brief review of our work before the client meeting.
Posted 14 May 2014 16:25
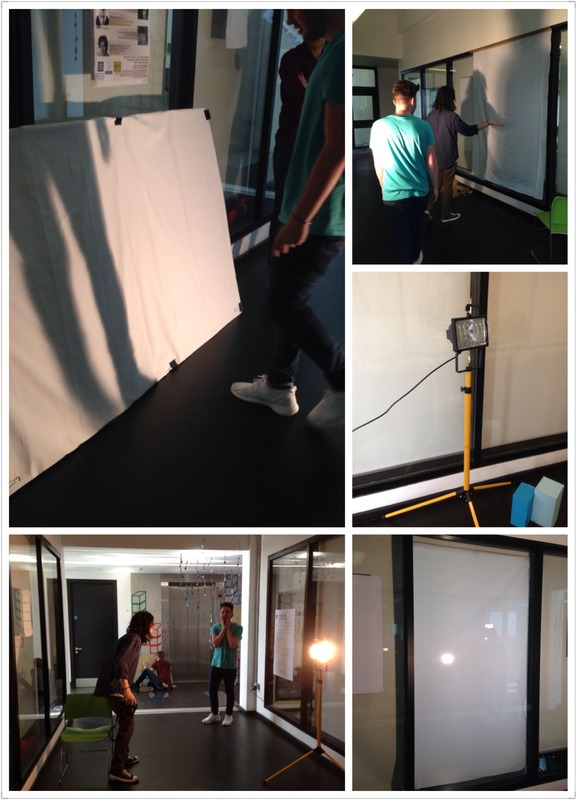
Day 6, made a screen and put it on the 8th floor, Chatham. Finally we found a specific solution for this new Chatham site.
Posted 14 May 2014 16:24
06b_ While the main aim of our model was to represent the technology, we added a sample flooring and some walls to give an indication of structure.
Posted 14 May 2014 16:20
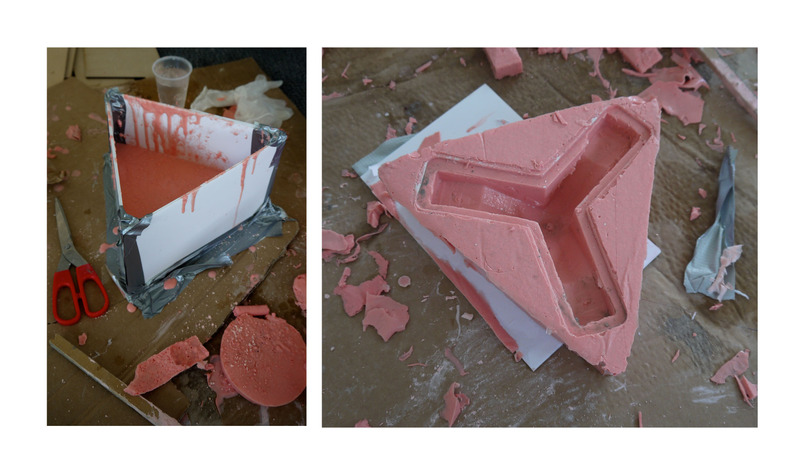
Pouring plaster into the mould.
Posted 14 May 2014 16:19
Making mould in a smaller scale with alginate.
Posted 14 May 2014 16:18
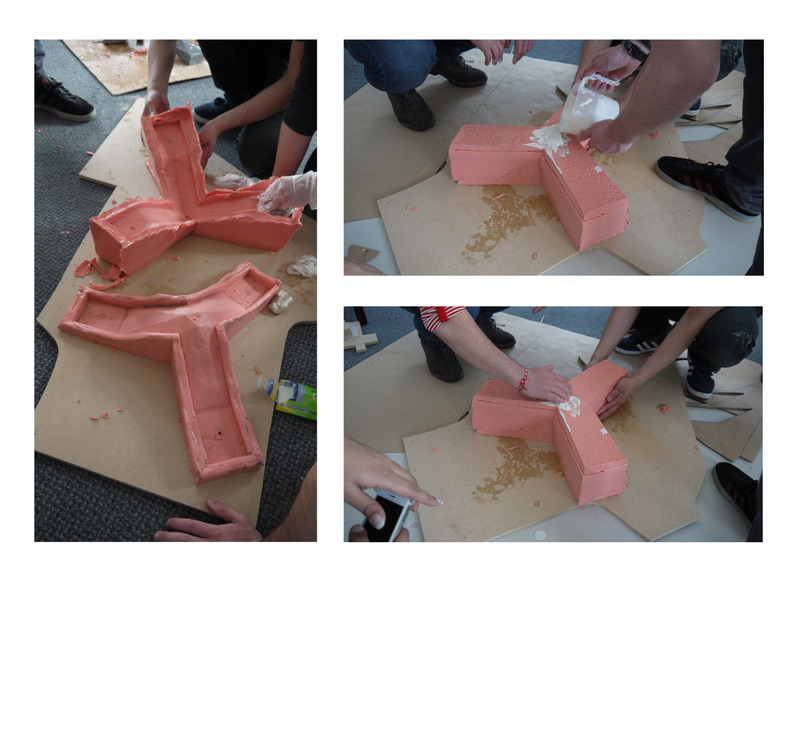
To make moulds of the component we needed to decide which material worked best for making the mould and for the component itself. So we carried out tests using resin latex and plaster.
Posted 14 May 2014 16:16
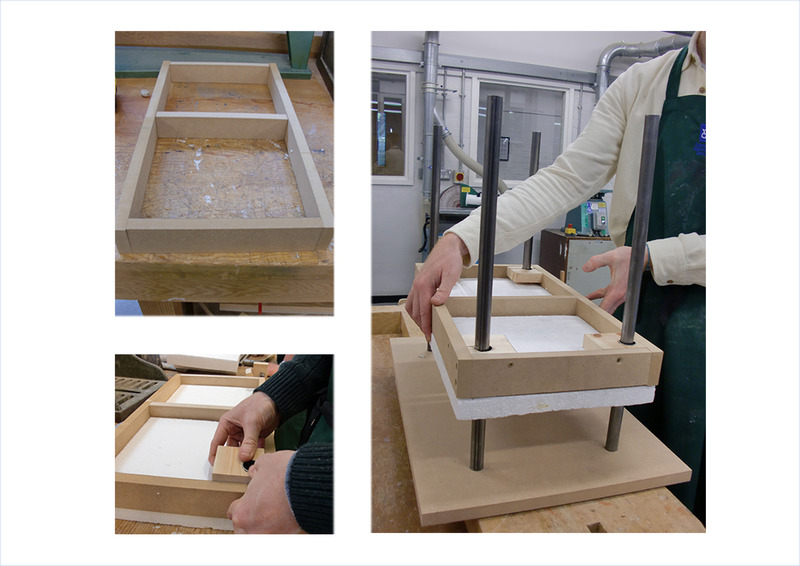
06a_ We then began to construct a 1:10 model. A simple timber structure held in the styrofoam base that represented the mushroom material. This was able to slide up and down metal piles that were fitted to the base.
Posted 14 May 2014 16:16
We spent the day 3d printing out each groups components. A final component was made using the aspects of each.
Posted 14 May 2014 16:15
Perspective of one of the two design proposals presented to the client.
Posted 14 May 2014 16:14
08/06/2014
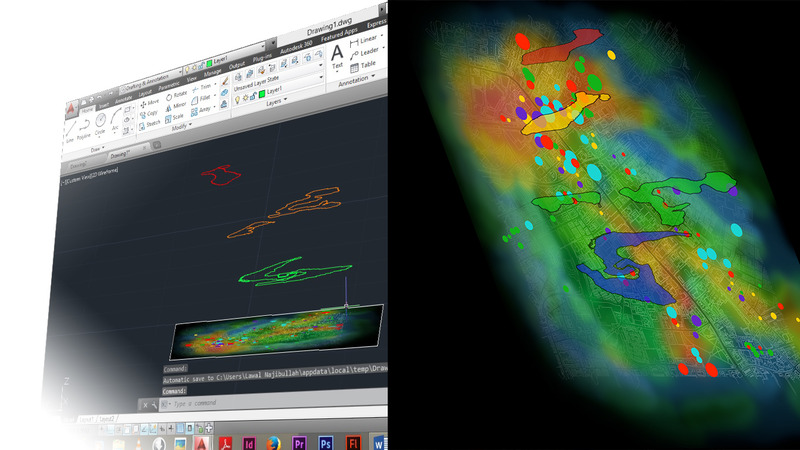
Making the heat map in 3d would make it more visually appealing .Tracing out the outline of the heat map to see how the contours could be generated and then merged together with the heat map to give a final image.
Posted 14 May 2014 16:14
Original 3d mapping for university based data set. Including continuation, employment, average income and satisfaction of courses in UoM and MMU.
Posted 14 May 2014 16:12